Web HostingBudget-friendly shared hosting plans
 Domains SearchFrom .com to unique country domains, explore and register extensions worldwide.
 WordPress HostingPower your blog or business with WordPress hosting.
 Email HostingSimple, secure email hosting that helps you stay connected and professional.
 Reseller HostingStart your own hosting business with easy and reliable reseller hosting plans.
 AffiliateJoin our affiliate program and earn commissions every time you bring in new customers.
 cPanel HostingHosting powered by cPanel, the world’s most user-friendly control panel.
 Windows HostingBuilt for Windows applications and websites
 IN Domain PricesDon’t miss out on the best domain deals in India!
 WHOIS LookupFind out who owns a domain name with a quick and easy WHOIS search.
 .Com DomainGet the most trusted domain for worldwide credibility
 All TldsSearch and register domain extensions worldwide.
 VPS HostingPowerful virtual servers. Full root access. Reliable uptime.
 Managed VPS HostingNot a tech expert? Choose our fully managed VPS service.
 Dedicated ServersTake full power and total control of your own physical server.
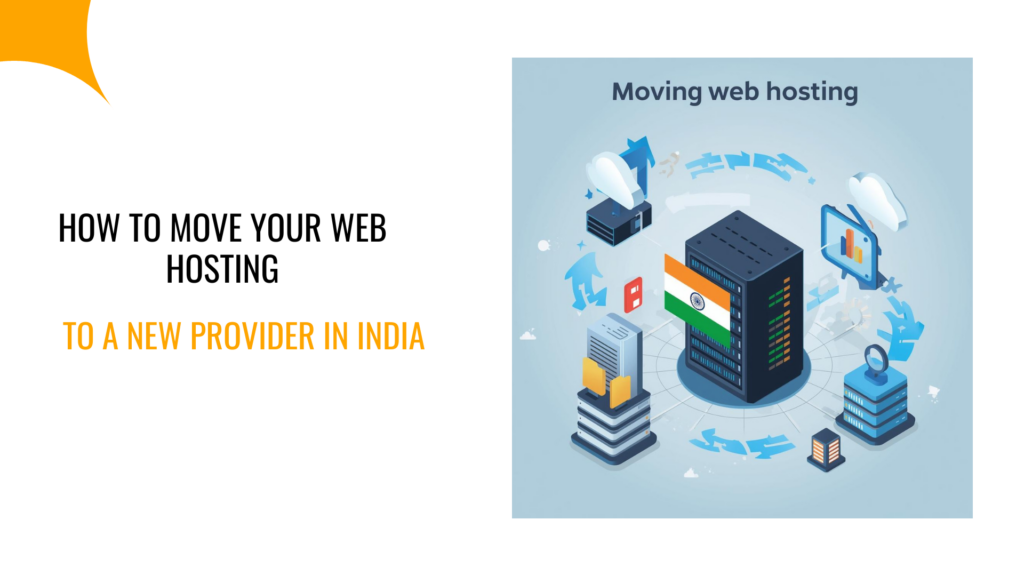
Moving your website from one hosting provider to another sounds stressful.
I get it.
You’re worried something will break or worse, your site might go offline.
But here’s the good part.
Transferring web hosting from that frustrating provider to a reliable one like Truehost is as easy as abc.
Once you understand the process, it becomes a smooth, predictable, step-by-step task.
In India, website owners switch hosting providers for several reasons, including poor support, slow speeds, unexpected charges, or reliability issues.
And if you’re going through the same frustrations right now, this guide is for you.
Let me walk you through everything you need to transfer your web hosting safely, without downtime, and without losing data.
Why Transfer Your Web Hosting to a New Provider
There’s always a trigger that pushes someone to switch hosting. Maybe you’re experiencing one of these:
- Slow website speed: Indian customers leave quickly if a page takes more than 3 seconds to load. In short, if your host isn’t optimized, your site will feel sluggish.
- Frequent downtime: Nothing hurts your brand more than visitors seeing “site can’t be reached” error.
- Poor customer support: Many providers in India take hours or days to reply to your concerns, which can hurt your website when it’s an urgent issue that needs a quick fix.
- Hidden fees: Some hosts increase renewal prices unexpectedly.
- You need more resources: As your business grows, you might outgrow your shared hosting and need cloud, dedicated server, or VPS hosting.
In short, a reliable provider helps your website run faster, stay online, and scale easily.
That’s why many users switch to stable platforms like Truehost for better performance and support.
What You Need Before Moving Your Web Hosting
Before you start the transfer, you need a few things in place. This is what saves you from downtime, errors, and last-minute surprises.
So, here’s what to prepare:
- Log in to your current hosting account: You’ll need this to download backups and access your files.
- Log in to your new hosting account: This is where you’ll upload everything after the move
- Domain login credentials: Whether you bought your domain from GoDaddy India, BigRock, Namecheap, or Truehost India, you must be able to update your nameservers
- A full website backup: This includes all files, uploads, themes, and plugins
- Database login details: Especially if your site runs on WordPress, PHP, or any MySQL-based system.
- Email backup (optional but recommended): Many users in India forget this part and lose old messages during migration.
Once you’ve gathered all of these, the transfer becomes smooth and stress-free.
How to Choose the Right Web Hosting Provider in India
Most people rush through this step and regret it later.
If you’re switching hosts, you want the next one to actually solve your problems. Not creating new ones.
So before you sign up anywhere, check a few things that truly matter in the Indian market.
1) Server performance
In India, where a lot of visitors browse on mobile networks, every millisecond counts.
So, the first thing to look at when choosing a provider to switch to is server speed.
Prioritize web host providers that use SSD storage, LiteSpeed, or cloud infrastructure, as they tend to load websites much quicker.
2) Uptime That You Can Rely on
You don’t want your site to go offline randomly.
So, aim for 99.9% uptime or better. It’s a simple filter that removes a lot of unreliable providers instantly.
3) Support That Doesn’t Disappear When You Need It
If you’ve ever waited hours for a reply, you know how stressful it gets. And that happened because maybe you ignored the red flags in customer support.
Now, once bitten, twice shy.
Always look for a host with fast responses, whether it’s chat, ticket, email, or phone. Avoid those that only use bots.
4) Honest Pricing
Some companies show a low first-year price and then triple the cost at renewal.
That means, before signing up, check the renewal fees, backup charges, migration fees, and email hosting costs.
If the pricing is transparent, it saves you from nasty surprises and helps you budget from the word go.
5) Free Migration Help
If you’re not confident about moving your site on your own, choose a host that handles the transfer for you.
For example, at Truehost, we offer free website migration in India, which makes life much easier, especially if you’re new to hosting or running a large website.
6) Future-ready Plans
Your traffic won’t stay the same forever. You might need more storage, more email accounts, or a better server eventually.
So, pick a provider that gives you room to upgrade without forcing you to change hosts again.
How to Back Up Your Website Before Web Hosting Transfer
Even one wrong click can break your site, and rebuilding everything from scratch is the last thing you want.
So, don’t start a migration without a backup.
In short, make sure you have a complete copy of your website.
If you’re using WordPress or any PHP/MySQL-based CMS, your backup usually includes:
- All website files
- Themes
- Plugins
- Uploads (images, PDFs, media)
- WordPress core files
- The MySQL database
On the other hand, if your old host uses cPanel, the process is simple:
- Log in to cPanel.
- Open File Manager and download your entire website folder, usually the public_html.
- Go to phpMyAdmin, select your database, and export it.
- If you use server-hosted emails, download or sync your email backups too.
But that’s the manual way.
Prefer automation?
WordPress plugins like UpdraftPlus, All-in-One WP Migration, or BackupBuddy can do it for you automatically.
They create full backups with a single click and let you restore everything easily.
Either way, once your backup is stored safely locally or on cloud storage, you’re ready for the actual move.
Step-by-Step Guide to Transfer Your Web Hosting
Ready to move your site? Great.
Here’s a straightforward flow to follow.
- Back up your website: Make sure you have all files and the database saved. This is your safety guard in case something goes wrong.
- Set up your new hosting account: Sign up, log in, and get the control panel ready, whether it’s cPanel, CyberPanel, or anything else.
- Upload your website files: Use File Manager or FTP and place files into the new public_html (or equivalent) folder.
- Import your database: Create a new database and user. Then upload your .sql file via phpMyAdmin or your database tool.
- Update DNS or nameservers: Go to your domain registrar and replace old nameservers with new ones provided by your new host. This step connects your domain to the new server.
- Test your website: Visit your domain and check that pages load properly, images show, links work, and forms submit correctly.
- Switch traffic to the new server: Once everything works, the old hosting is no longer needed. So, let the new server handle all site traffic.
That’s all!
Follow this order, and your hosting transfer becomes manageable and doable without needing a developer.
How to Move Website Files and Database to the New Web Hosting
Your new hosting account is now ready? Right
The next thing is to move your actual website. The files and database.
Here’s how:
Step 1: Upload Your Website Files
You can do this from cPanel or an FTP tool like FileZilla.
Here’s the simple way using cPanel:
- Open File Manager
- Go to public_html or your main domain folder
- Upload your backup ZIP file
- Extract everything inside that folder
If your site had subfolders on the old server, keep the same structure here to avoid broken pages.
Step 2: Create a New Database
Most websites in India run on WordPress or other CMS platforms that use MySQL. So you’ll need a new database on the new server.
Inside cPanel:
- Open MySQL Databases
- Create a new database
- Create a new database user, and
- Assign the user All Privileges
These details will be important in the next steps, so note them down.
Step 3: Import Your Database
Now you’re bringing in your website’s data.
- Open phpMyAdmin
- Select the new database you created
- Click Import
- Upload your .sql file
The import may take a few seconds or a few minutes, depending on your database size.
However, the process might throw an error, usually due to file size limits or something that many Indian shared hosting plans have.
In such a case, you can fix that issue by splitting the SQL file or using SSH/CLI if your plan allows it.
Step 4: Update Your Configuration File
Your website now needs to talk to the new database.
Depending on what you use:
- WordPress: edit wp-config.php
- PHP scripts: edit config.php
- Laravel or other frameworks: update the environment file (.env)
Update, database name, username, password, and host (usually localhost, but some Indian hosts use a custom hostname)
Once this is done, your site is officially installed on the new server.
Common Web Hosting Transfer Problems and Fixes
Even with a careful migration, a few issues can still pop up.
But the best part is that every issue below has a simple, direct fix.
| Problem | Why It Happens | How to Fix It |
| Error establishing database connection | Wrong database name, username, or password in your config file | Update details in wp-config.php, config.php, or .env using the new hosting credentials |
| Broken images or missing CSS | File paths changed, or some files didn’t upload correctly | Re-upload missing folders. For WordPress, update URLs in wp_options > siteurl & home |
| Emails not working | MX or DNS records weren’t updated after migration | Add correct MX records from your new hosting provider or email service |
| The old website is still showing | DNS propagation is not complete | Clear cache, test using mobile data, or wait for DNS to fully update |
| Redirect loops | Incorrect .htaccess rules after migration | Reset .htaccess to default rules or add recommended rewrite rules |
Are any of the issues familiar? Nothing serious to worry about.
Once you know where the problem is coming from, the fix is usually quick. And if your new host offers responsive support, most of these can be solved within minutes.
Signing Out
You can now attest that transferring your web hosting is easy! Right.
With the right steps and a bit of patience, you can move your entire website without downtime or data loss.
If you’re switching because of speed, reliability, or better customer support, make sure your new web host is worth it.
Thankfully, at Truehost, we offer fast servers, affordable pricing, and free website migration.
So you don’t need to be overwhelmed on deciding which is the most reliable web hosting in India. Truehost is.
Ready to start your transfer? Check out these Truehost deals to save costs.