Web HostingBudget-friendly shared hosting plans
 Domains SearchFrom .com to unique country domains, explore and register extensions worldwide.
 WordPress HostingPower your blog or business with WordPress hosting.
 Email HostingSimple, secure email hosting that helps you stay connected and professional.
 Reseller HostingStart your own hosting business with easy and reliable reseller hosting plans.
 AffiliateJoin our affiliate program and earn commissions every time you bring in new customers.
 cPanel HostingHosting powered by cPanel, the world’s most user-friendly control panel.
 Windows HostingBuilt for Windows applications and websites
 IN Domain PricesDon’t miss out on the best domain deals in India!
 WHOIS LookupFind out who owns a domain name with a quick and easy WHOIS search.
 .Com DomainGet the most trusted domain for worldwide credibility
 All TldsSearch and register domain extensions worldwide.
 VPS HostingPowerful virtual servers. Full root access. Reliable uptime.
 Managed VPS HostingNot a tech expert? Choose our fully managed VPS service.
 Dedicated ServersTake full power and total control of your own physical server.
Building a blog website can be overwhelming.
You’ve probably spent hours watching tutorials, only to end up more confused than when you started.
Or perhaps you’ve been putting it off because you don’t know how to code, and hiring a developer feels too expensive.
I get it.
Now imagine skipping most of this stress. That’s exactly what I set out to test.
I chose to vibe code a full WordPress blog website with Ollit AI.
In this article, I’ll walk you through everything I did so you can see exactly how it works and perhaps vibe code one yourself.
What Is Ollit AI?
Ollit AI is an AI-powered platform that helps users build websites without writing a single line of code.
It works by asking you a series of questions about your business or project, then automatically generating a fully structured website based on your answers.
Think of it as having a web developer, copywriter, and designer in one place.
What I Did Before Vibe Coding The Blog Website
Before jumping into Ollit AI, I took some time to plan.
This step is important because AI tools work best when you give them clear direction.
Here’s exactly what I did:
i) Decide on a Niche
The first thing to figure out is what your blog will be about.
Your niche determines your audience, your content, and ultimately how you’ll monetise the blog.
It’s tempting to go broad, but a focused niche helps you rank on Google and build a loyal readership faster.
I chose the fitness niche because:
- It interests me
- It’s evergreen (people are always looking to get fit)
- It has a wide range of sub-topics (nutrition, workouts, weight loss, muscle building)
- It offers solid monetization opportunities
ii) Decide on the Layout of the Website
Before building, it helps to have a rough idea of how you want your blog to look and feel.
You don’t need a detailed mockup; just a general direction.
Here are a few things to consider:
- Colour scheme: What colours represent your brand? For my fitness blog, I wanted a black background with red and white words.
- Theme style: Modern and minimal tends to work well for blogs. Avoid overly complex layouts that can distract from your content.
- Key pages: Think about what pages you’ll need. A Home page, Blog page, About page, and Contact page are the bare minimum for most blogs.
iii) Choose a Name for Your Blog
Your blog name is your brand. It should be descriptive, relevant to your niche, and easy to remember.
A good name gives you direction. It tells visitors exactly what to expect before they’ve read a single post.
I wanted something that clearly communicates the angle of my content. Not just fitness, but evidence-based fitness.
So, I named my blog The Scientific Fit Blog.
iv) Check Domain Availability
Ideally, your domain name should match your blog name exactly or be as close to it as possible.
This makes it easier for people to find you online and strengthens your brand identity.
So, once you have a name, it’s good to check if the domain is available. This helps avoid headaches when you want to launch your blog website.
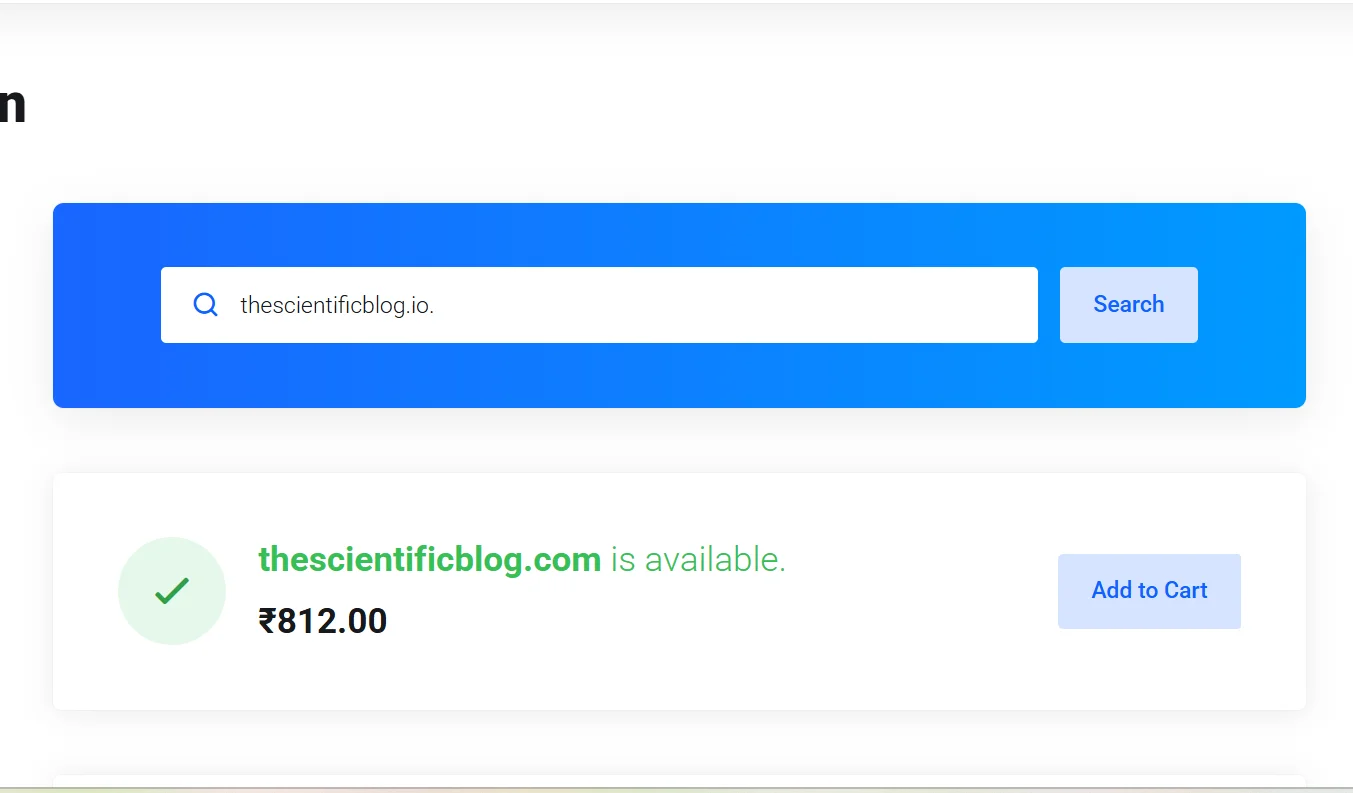
I checked domain availability at Truehost.
I went with thescientificblog.io. It’s close enough to the blog name, and the .io extension gives it a slightly tech-forward, modern feel.
v) Define Your Target Audience
Knowing who you’re writing for shapes everything, including your tone, topics, and the type of content you create.
In my case, the target audience included:
- Beginners starting their fitness journey
- People interested in science-backed fitness tips
- Readers tired of misinformation in fitness
vi) Plan Basic Content Categories
Finally, I mapped out a few core categories for the blog:
- Workouts
- Nutrition
- Recovery
This gave me a sense of what articles I’d start with on the website.
Having a content plan prevents the dreaded blank page syndrome once your site is live.
How I Vibe Coded My WordPress Blog Website
With my prep done, I was ready to build.
Here’s a step-by-step breakdown of exactly what I did:
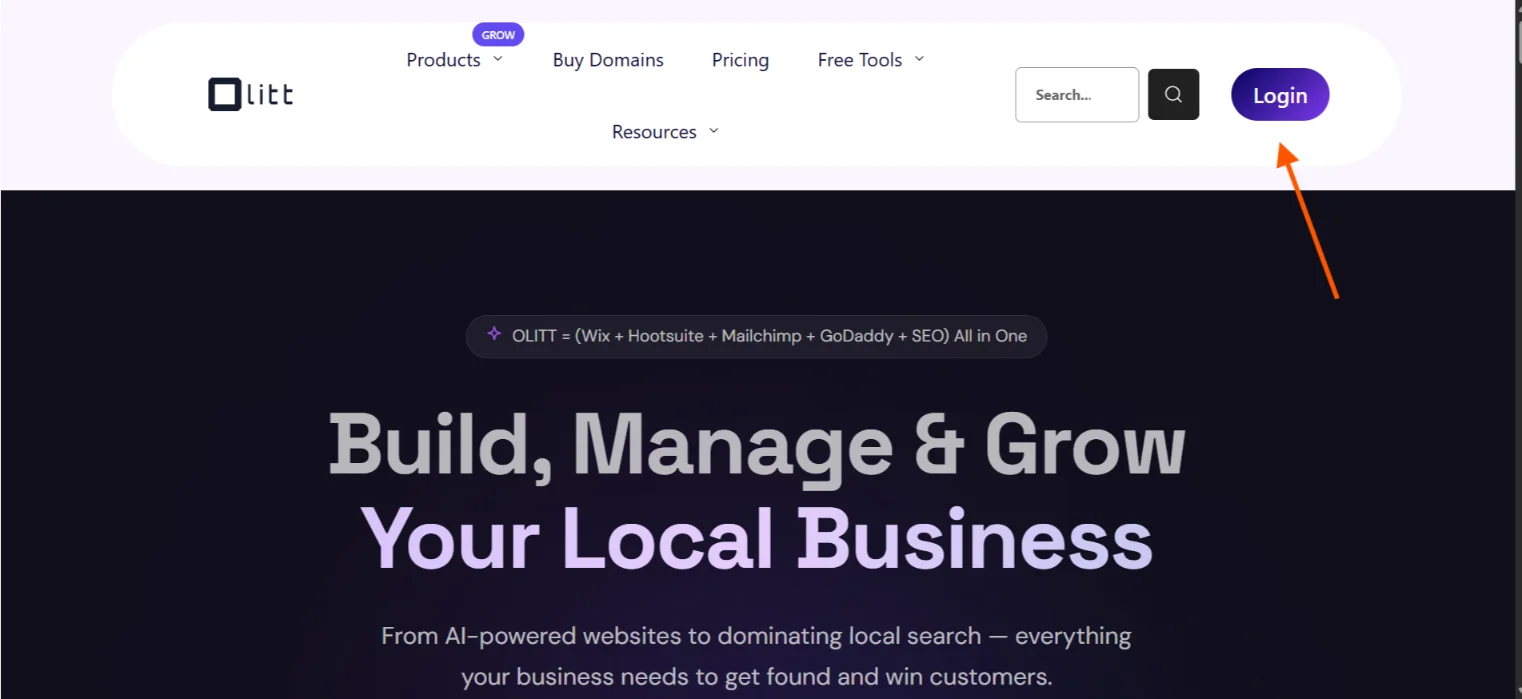
Step 1) Log In/ Create an Account on Ollit AI
I started by heading over to Ollit AI and logging in.
If you don’t have an account, you’ll need to create one.
The sign-up process is simple. Just the usual email and password setup; nothing complicated or technical.
Step 2) Answer the Onboarding Questions
After logging in, I clicked on Get Started.
The platform asked two onboarding questions to understand my intent.
Here’s what I selected:
- Are you a business owner? – Yes
- What type of business are you in? – Online

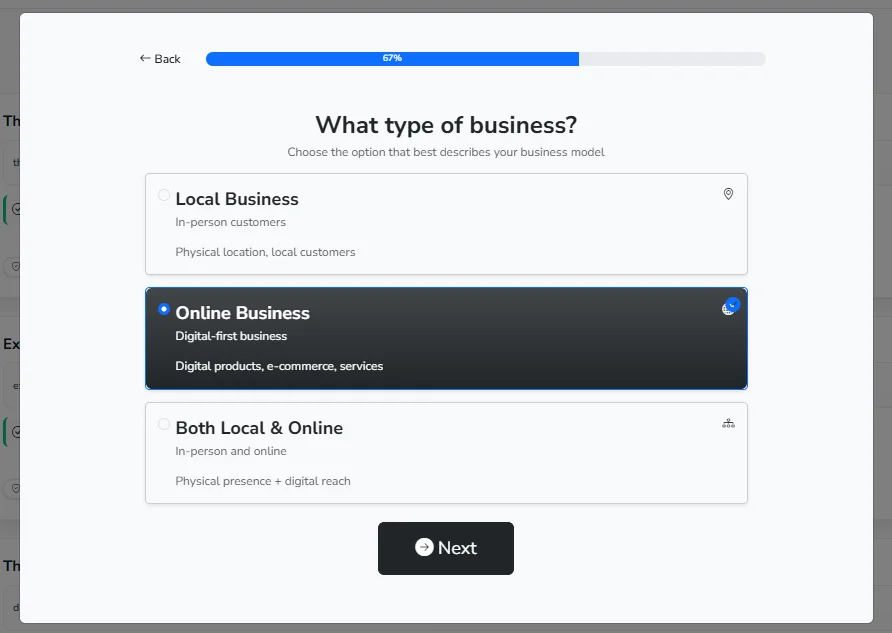
Once done, I clicked Next to proceed.
Tip: If you’re looking to make money from your blog at some point, select Yes on the “Are you a business owner” question. It helps Ollit generate a more structured and goal-oriented website.
Step 3) Navigate to the Websites Section
After onboarding, I landed on the main dashboard.
I scrolled down to the Websites section and selected Create With AI on WordPress.
This option allows you to have a fully functional WordPress website, built and structured by Ollit’s AI.
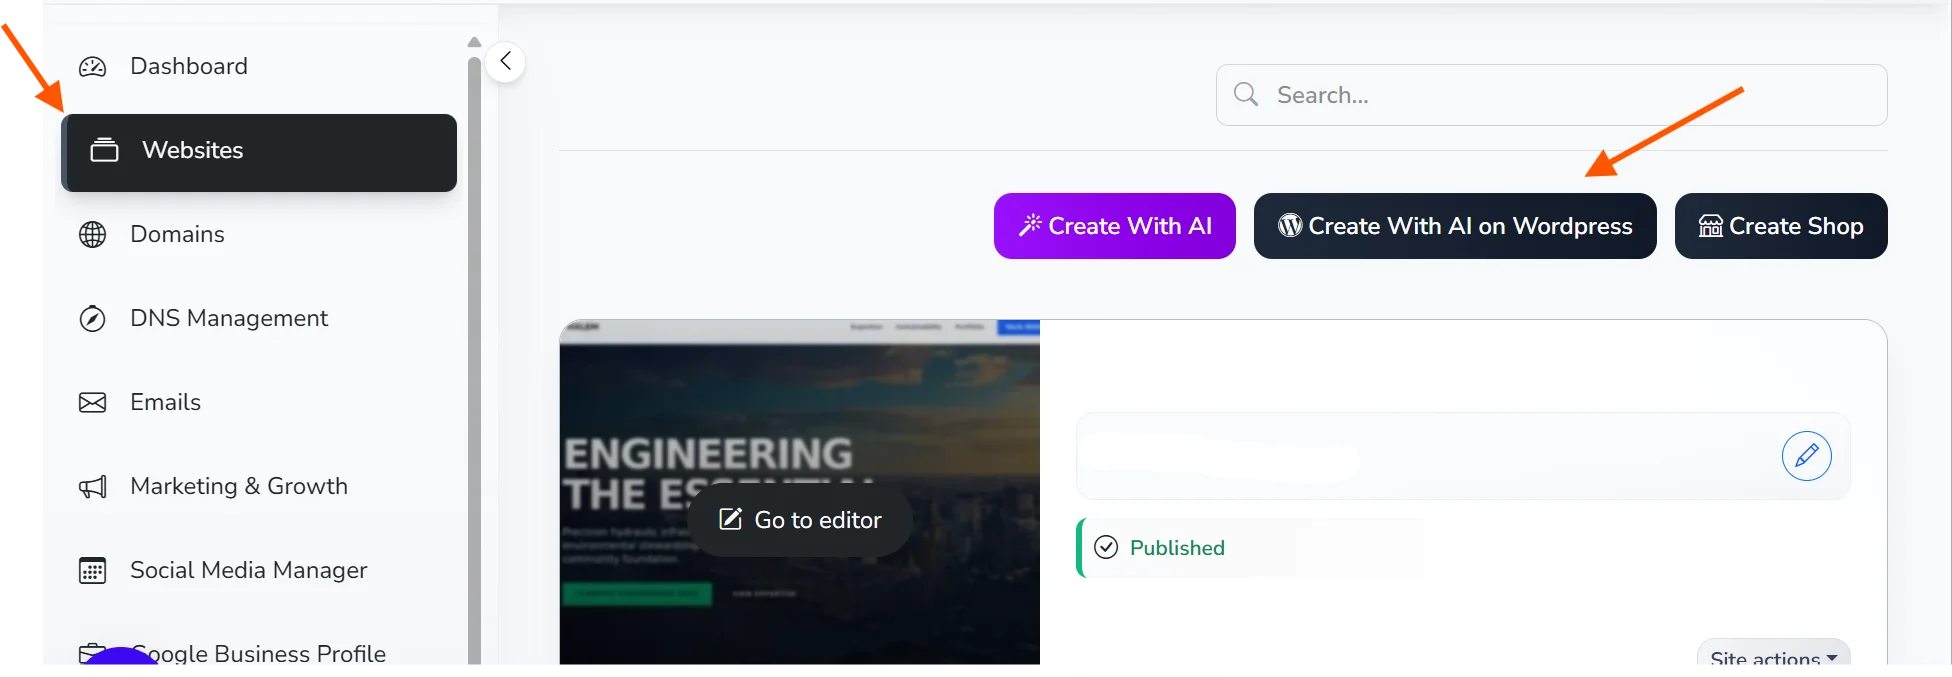
Tip: This section gives you two other options: Create with AI and Create Shop. If you plan to use a different CMS or run an e-commerce business, these options are better.
Step 4) Answer Ollit’s 10 Business Questions
After selecting Create with AI on WordPress, I was taken to a new page where Ollit asked me around 10 questions about my blog.
The questions were:
- What’s your business called?
- What is the main goal you want your readers to achieve here?
- What colors or visual vibes fit this scientific approach best?
- Who are the specific people you hope will find and read your fitness advice?
- What are the first three fitness topics you want to tackle on the blog?
- Where should readers go if they want to reach out or follow your updates?
- What are the specific handles for your Instagram and newsletter so we can link them?
- How quickly do you usually reply to people who reach out through your form?
Here are some of my answers:
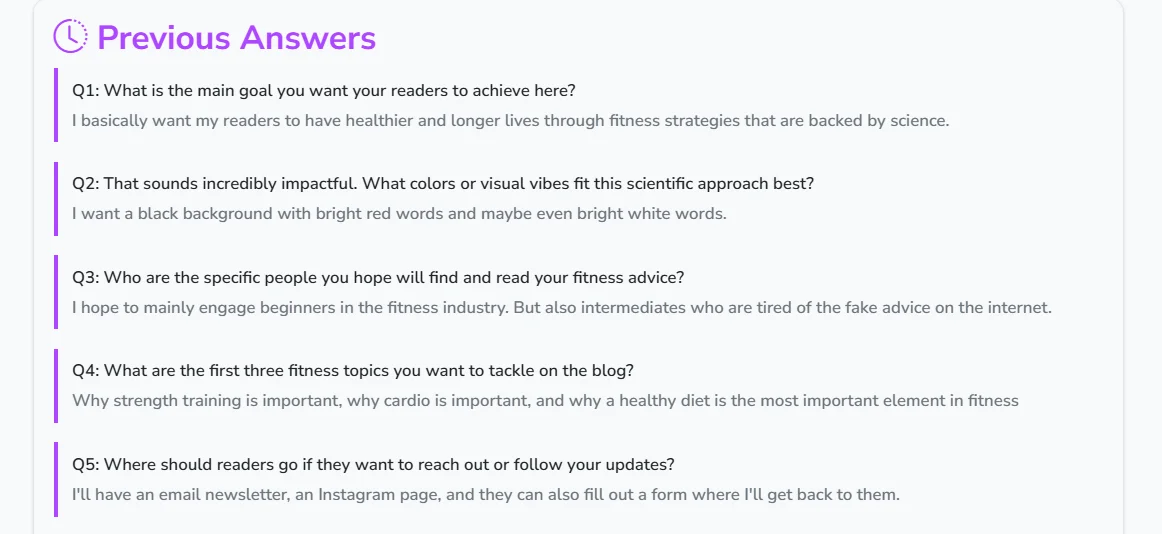
Tip: Answer the questions like you’re talking to a human; the AI will understand. However, the more specific and detailed your answers, the better your website will turn out.
Step 5) Review the Website Description and Proceed
After answering all the questions, Ollit generated a summary of the website it was about to build.
This included:
- The structure of the site
- The tone and style
- The type of pages it would include
I reviewed everything carefully, and it matched what I had in mind.
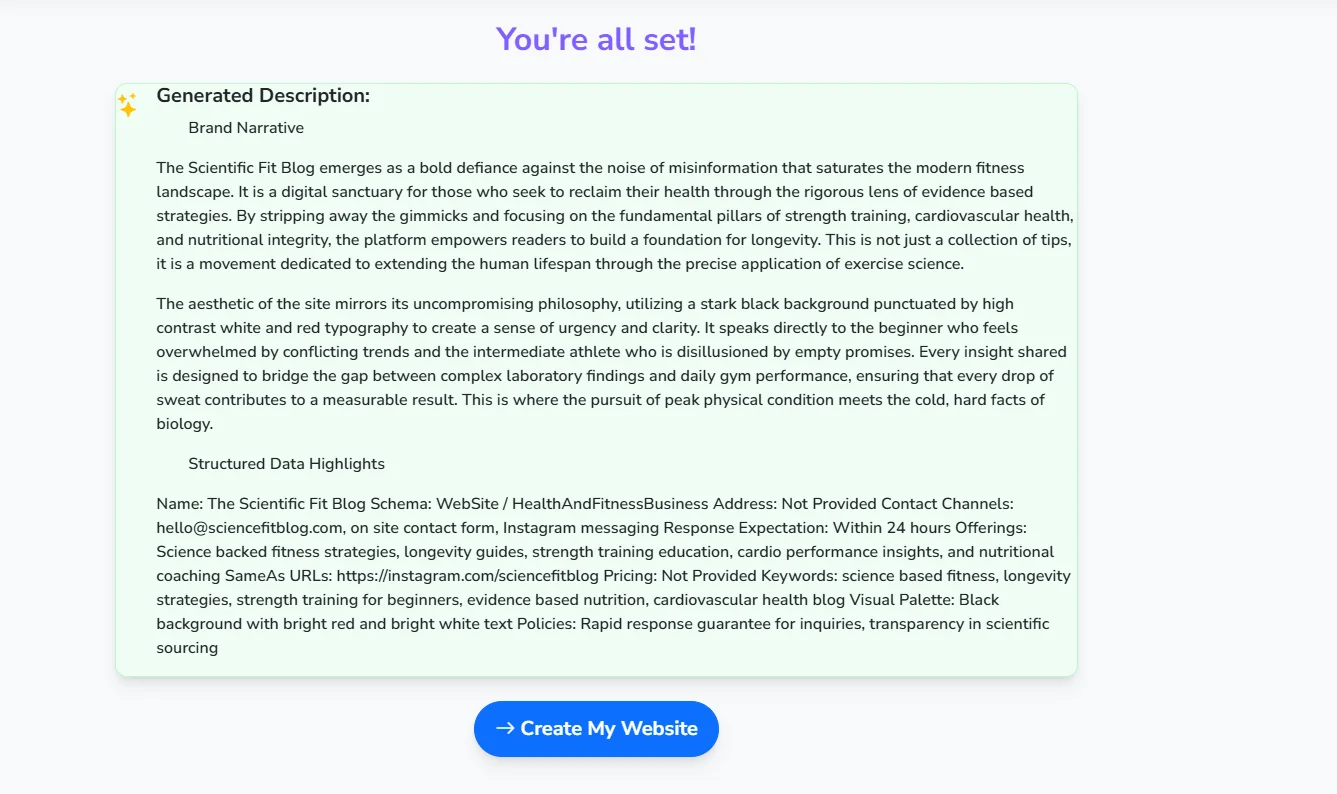
Once I was satisfied, I clicked Create My Website.
Step 6) Select a Plan
After clicking Create My Website, Ollit prompted me to choose a plan.
In my previous article, I went with the basic (Hobby) plan just to test things out.
This time, I decided to choose the Business plan so I could walk through a different option and get a broader perspective on how the platform works across plans.
If you’re just starting, you can still begin with a lower-tier plan to get familiar with everything.
However, you can also consider trying one of the paid plans since they come with more than just the website builder. They include business email options, free domains, and much more.
You can view Ollit AI pricing here.
Step 7) Watch the Magic Happen
This was easily the most interesting part.
Ollit took me back to the dashboard and started building the website in real time.
You can actually see the AI working. It’s surprisingly exciting to watch.
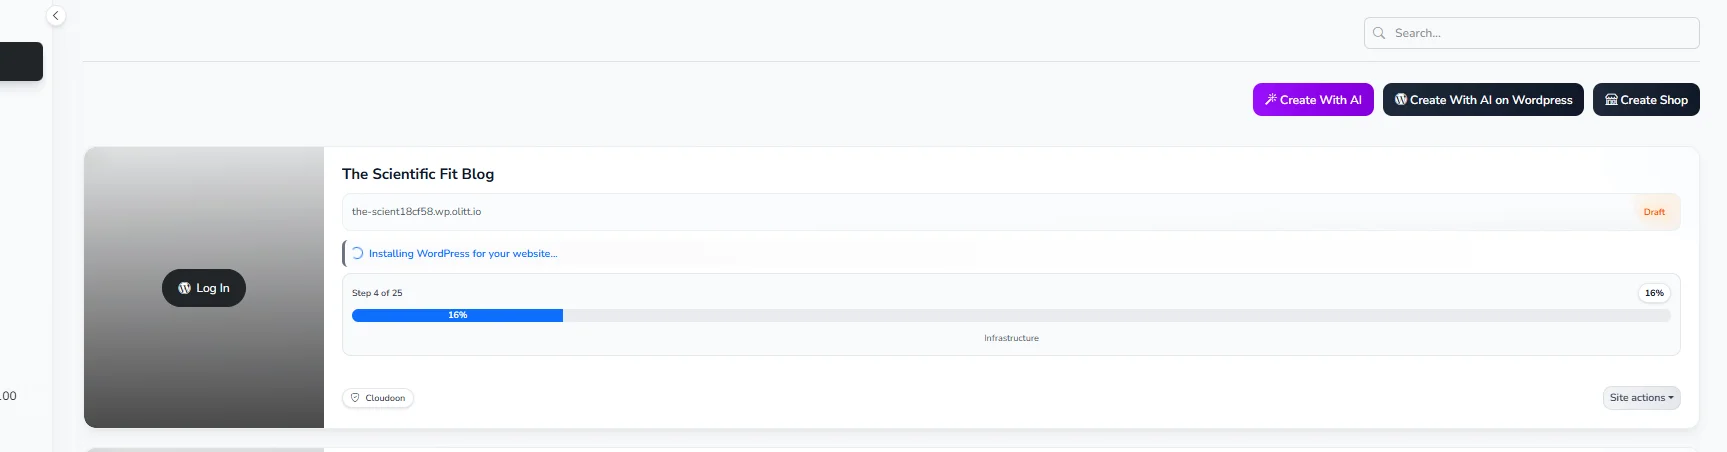
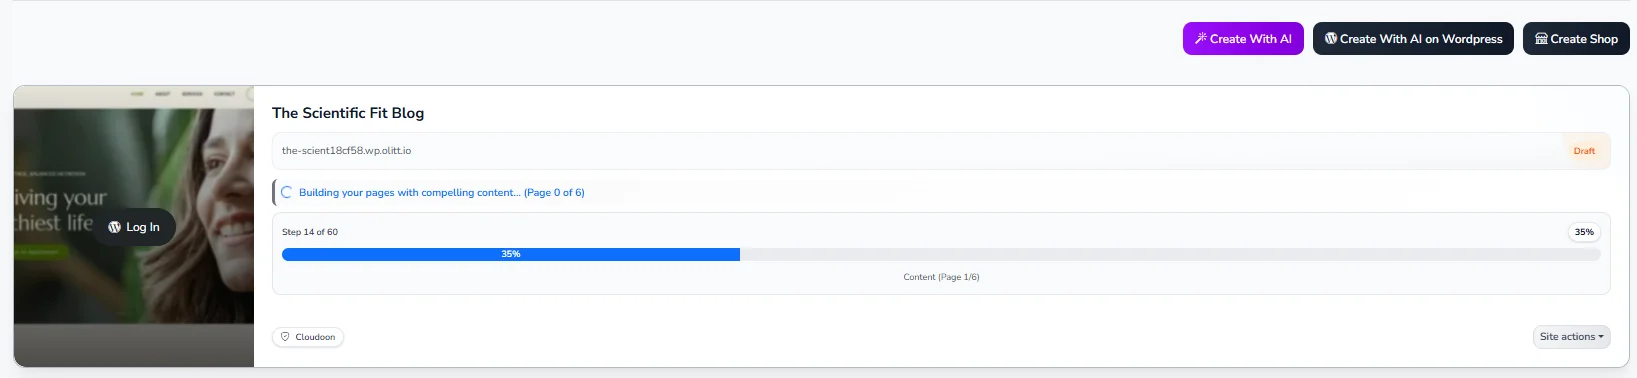
The entire process took less than five minutes.
What normally takes hours (or even days) was done almost instantly.
Step 8) View the Website
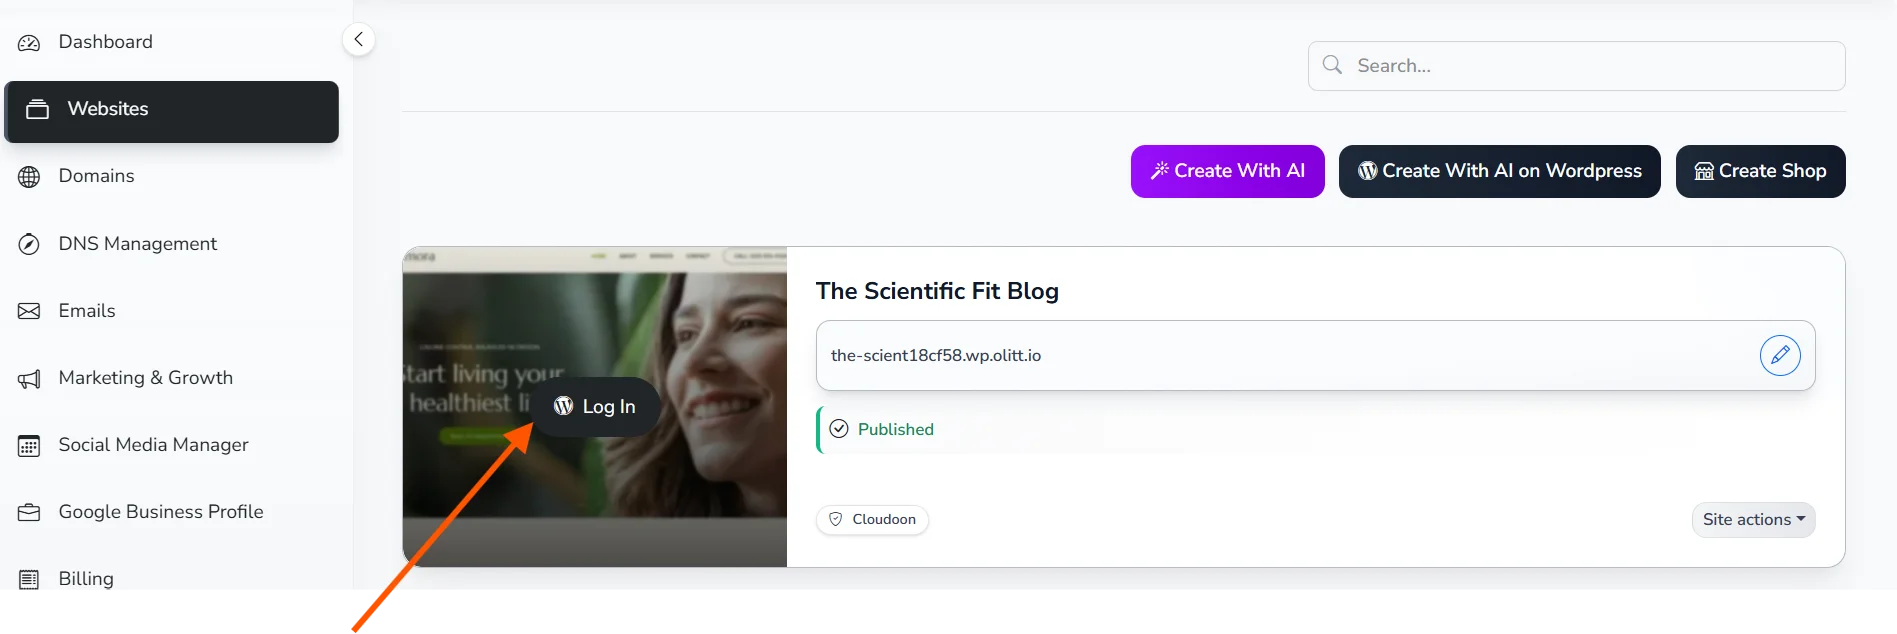
Once the build was complete, I clicked on the website name.
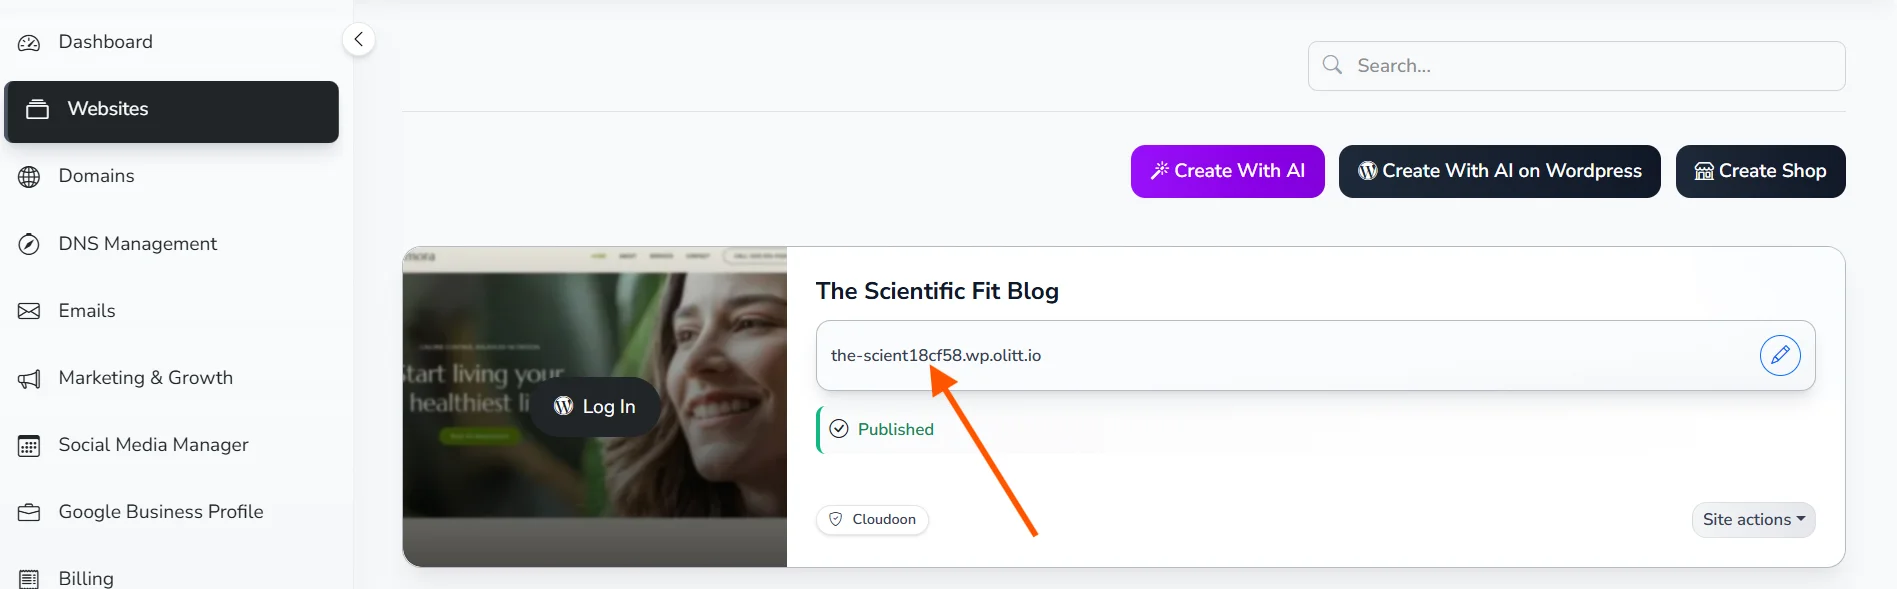
This opened the website in a new tab.
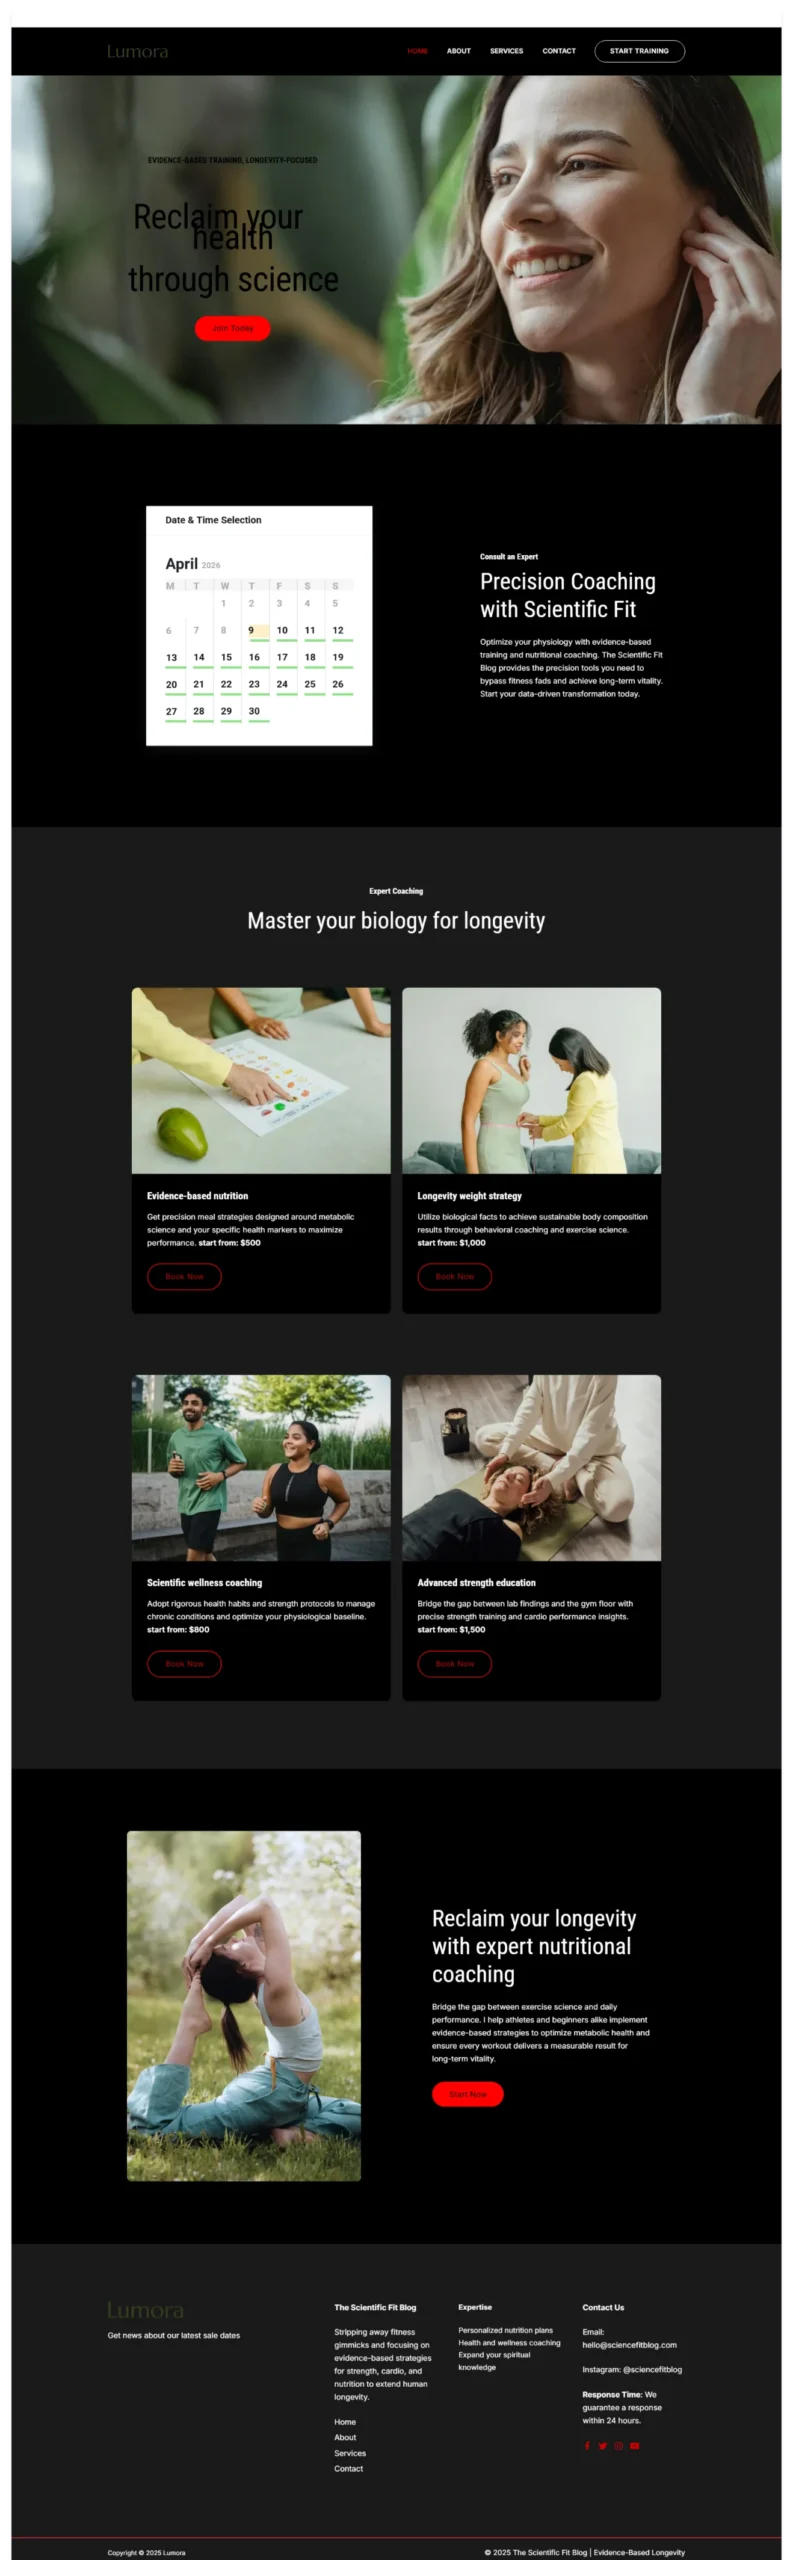
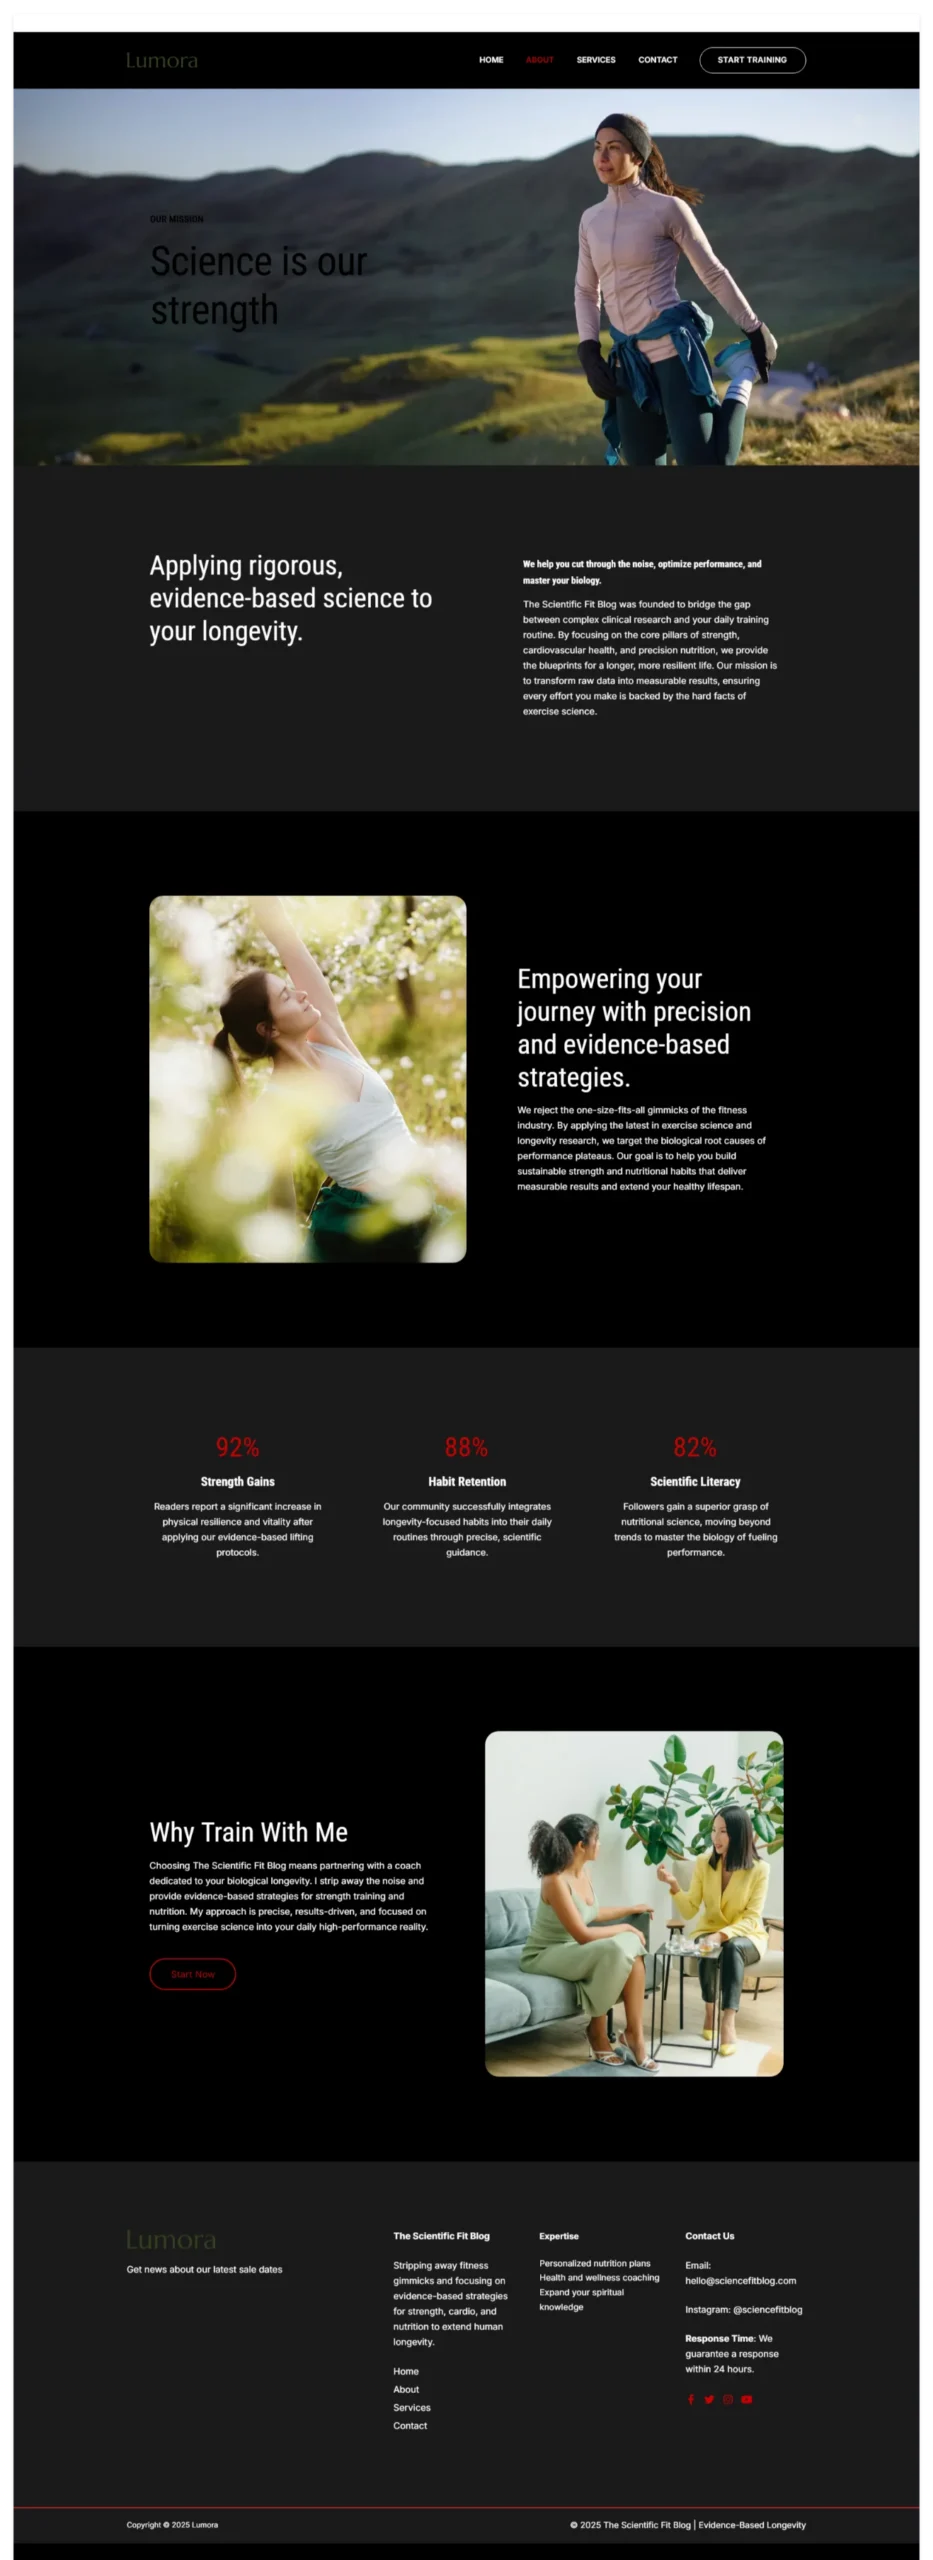
The result?
A clean, well-structured blog website with:
- A professional homepage
- Organized navigation
- Pre-built sections for content
- A cohesive design
It wasn’t perfect, but it was far from basic. It felt like a solid first version of a real blog.
Here are some of the pages:
Step 9) Edit on WordPress
After generating the site, the next step is logging in to WordPress to refine everything.
This is where you take full control.
To do this, click on the Log in option with the WordPress logo.
Inside WordPress, I’ll:
- Edit the text to match my voice
- Adjust images and visuals
- Fine-tune layouts
- Organize blog categories
This step is important because AI gives you a strong foundation, but your personal touch is what makes the site unique.
I’ll show you how I did mine in a later article.
What I Loved About The Blog Website
a) Clean and Simple Design – The website has a minimal, distraction-free layout that makes it easy to focus on the content and message.
b) Easy Navigation – Everything is clearly organized, making it simple for visitors to find key sections without confusion.
c) Built-in Features That Support Growth – From contact forms to basic SEO structure, the site already includes tools that help attract visitors.
d) Monetization Features From the Start – I initially just wanted a simple blog. However, selecting the “I’m running a business” option automatically unlocked features geared toward monetization. This was a nice surprise.
Making the Blog Website Live
Having a beautiful blog website sitting on Ollit’s platform is great. But to truly own your space on the internet, you need to make it live on your own domain.
This is the step that turns your project into a real, publicly accessible website.
To make your website live, you’ll need at least two things:
- A domain name: This is your website’s address on the internet (e.g., thescientificblog.io). You register this through a domain registrar.
- A hosting plan: This is the service that stores your website files and makes them accessible on the internet.
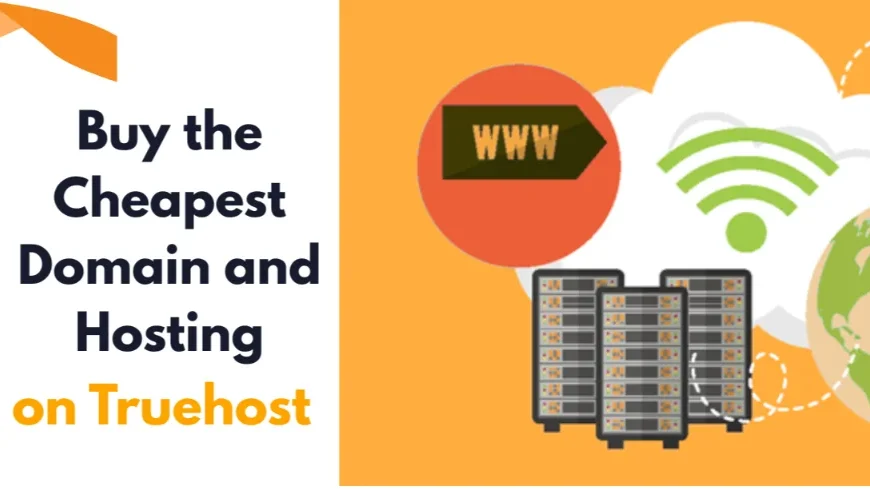
For both domain registration and hosting, I recommend using Truehost.

We are an affordable and reliable web hosting provider that makes it easy to get your WordPress blog up and running quickly.
We offer hosting packages designed specifically for WordPress, meaning your site will be optimized for performance right from the start.
Here’s what you’ll need to do:
1) Visit our website and search for your desired domain name. You already did this research in the prep stage, so you know what’s available.
2) Purchase a domain that best matches your blog name. Keep it short, easy to remember, and relevant to your niche.
3) Select a WordPress hosting package that suits your budget and expected traffic. We also have shared hosting, cloud hosting, VPS hosting (managed and unmanaged), and dedicated servers. You can view pricing here.
4) Once your hosting is active, you’ll point your domain to your Truehost server. This typically involves updating the domain’s nameservers, which our able team will walk you through.
5) Finally, export the WordPress site generated by Ollit AI and install it on your Truehost environment. This brings everything together.
Get Started
The combination of Ollit AI for building and Truehost for hosting is one of the most beginner-friendly and cost-effective setups available right now.
You don’t need to be a developer. You don’t need a big budget. You just need an idea and the willingness to get started.
So, what are you waiting for? Pick your niche, come up with a name, and vibe code your blog today.