 Web HostingBudget-friendly shared hosting plans
 Domains SearchFrom .com to unique country domains, explore and register extensions worldwide.
 WordPress HostingPower your blog or business with WordPress hosting.
 Email HostingSimple, secure email hosting that helps you stay connected and professional.
 Reseller HostingStart your own hosting business with easy and reliable reseller hosting plans.
 AffiliateJoin our affiliate program and earn commissions every time you bring in new customers.
 cPanel HostingHosting powered by cPanel, the world’s most user-friendly control panel.
 Windows HostingBuilt for Windows applications and websites
 IN Domain PricesDon’t miss out on the best domain deals in India!
 WHOIS LookupFind out who owns a domain name with a quick and easy WHOIS search.
 Domain TransferTransfer your domain to us and enjoy reliable support every step of the way.
 .Com DomainGet the most trusted domain for worldwide credibility
 All TldsSearch and register domain extensions worldwide.
 SSL CertificatesProtect your website with trusted SSL certificates and keep customer data safe.
 VPS HostingPowerful virtual servers. Full root access. Reliable uptime.
 Managed VPS HostingNot a tech expert? Choose our fully managed VPS service.
 Dedicated ServersTake full power and total control of your own physical server.
 AI Website BuilderCreate stunning websites instantly with our easy AI builder.
 Online ShopBuild your eCommerce store easily, no coding, just growth.
 Web Design ServicesGet a website built for your brand and designed for your goals.
 Contact UsReach out to us for support or questions.
 SupportGet answers and how-to guides for all our services.
 BlogRead our latest blogs on web hosting, online business, digital marketing, and other helpful topics.
Picking a domain name feels exciting until checkout throws up questions you didn’t expect.
Which extension fits your business? What documents do you need? Why does the payment keep failing?
This guide walks through every step of buying a domain on Truehost India, from your first search to activation, and covers the common snags along the way.
What You’ll Need Before You Start
Before you open the search bar, gather a few basic details. Every domain registration asks for WHOIS contact information, so have these ready:
- Full name
- A valid email address that you check often
- A working phone number
- Your physical address
Most buyers never see an ID request during a standard purchase. Truehost may ask for a PAN card only if a registry flags your order for a dispute or a verification check.
This happens rarely and usually resolves within a day or two once you upload the document.
If you’re buying as an individual, you don’t need a GST number. Businesses invoicing under a company name should keep their GST details handy, since some checkout flows ask for them during billing.
On pricing, expect to pay between ₹300 and ₹800 for the first year, depending on the extension you pick. Knowing this range upfront means checkout won’t surprise you.
Step 1: Search for Your Domain on Truehost.co.in
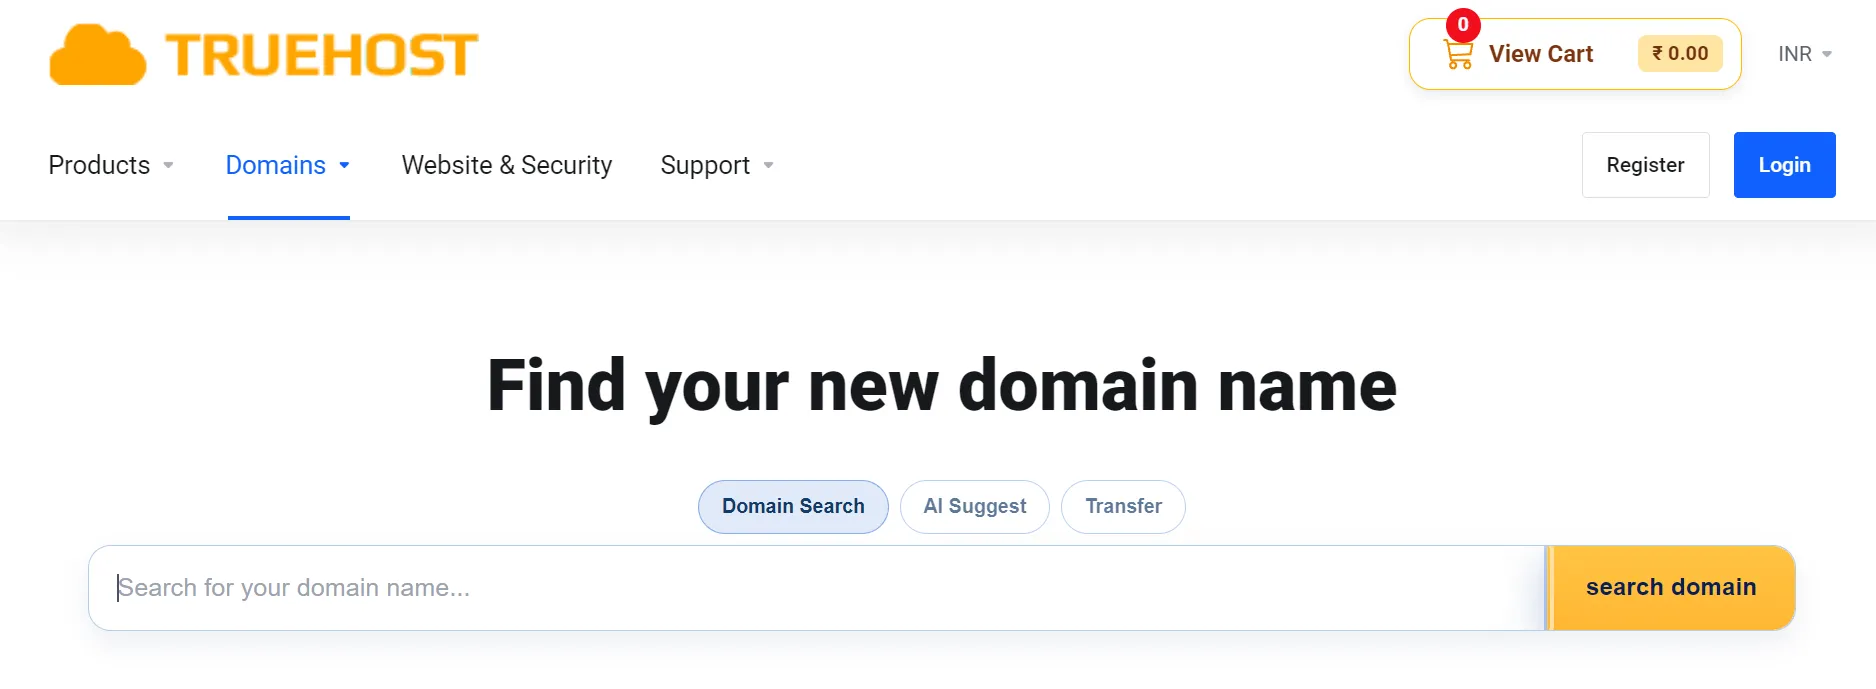
Head to the Truehost homepage and look for the domain search box near the top. Type your desired name into the field and hit search.
The results page shows whether your exact name is available. If someone already owns it, the page suggests close alternatives with different extensions or slight spelling tweaks.
Keep your domain name simple. Avoid hyphens and numbers where possible, since they make a name harder to remember and share out loud.
Step 2: Choose Between .in and .co.in (and Other Extensions)
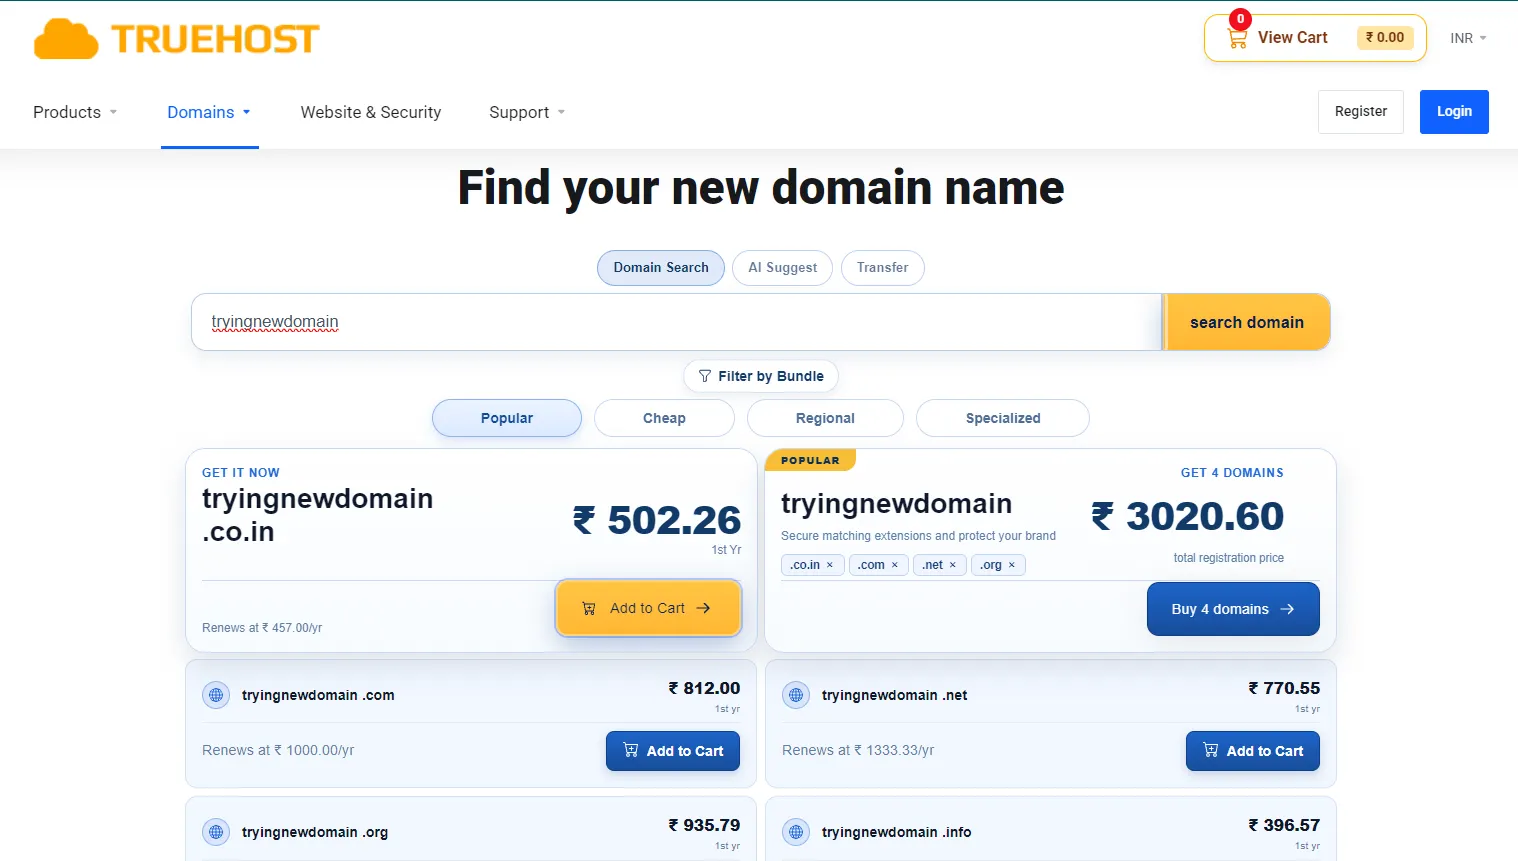
The extension you pick sends a signal to visitors before they read a single word of your site.
A .in domain, reads as a general, national identity. It suits personal sites, blogs, and brands that want broad appeal across India.
A .co.in domain leans more commercial. It works well for registered businesses that want their extension to reflect a formal company structure.
If your audience stretches beyond India, .com remains available through Truehost too. It carries global recognition and works for brands planning international growth.
Pricing varies across these extensions on Truehost, so check the live rate for each one before deciding. A small price gap now can add up across renewal years.
Step 3: Add to Cart and Create Your Truehost Account
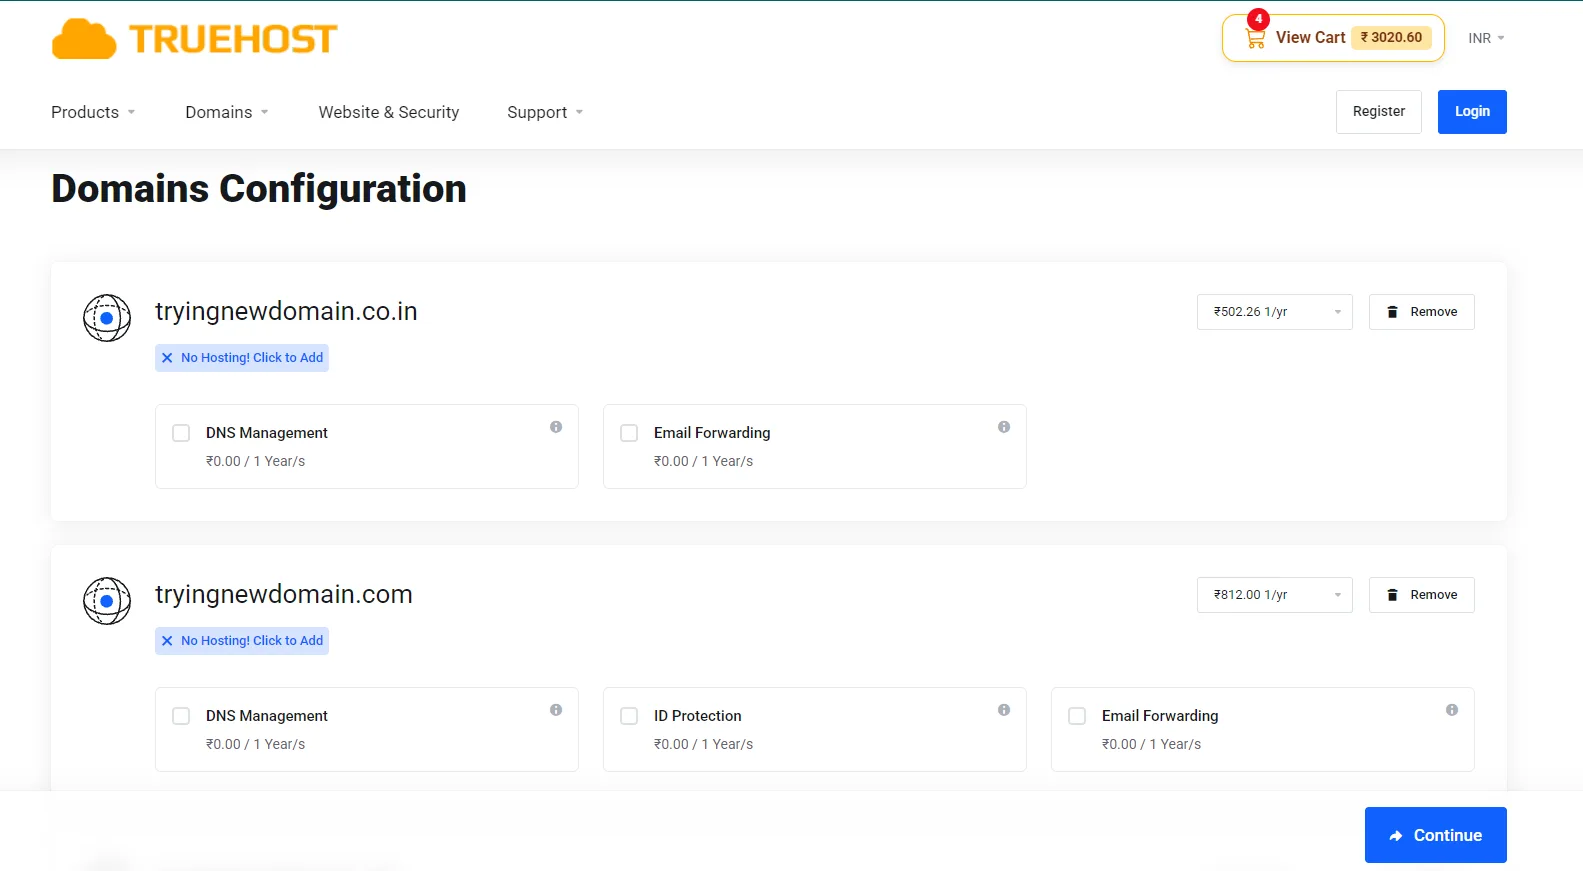
Once you’ve chosen your domain, add it to the cart and move to account creation.
The signup form asks for your name, email address, and a password. It takes less than a minute to complete.
If you already have a Truehost account, log in instead of signing up fresh. Your saved details carry over, which speeds up the rest of checkout.
During this step, Truehost often displays optional add-ons like privacy protection, professional email, and a website builder.
Skip any of these for now if you don’t need them yet. You can add them later from your account dashboard.
Step 4: Decide Domain-Only or Domain Plus Hosting
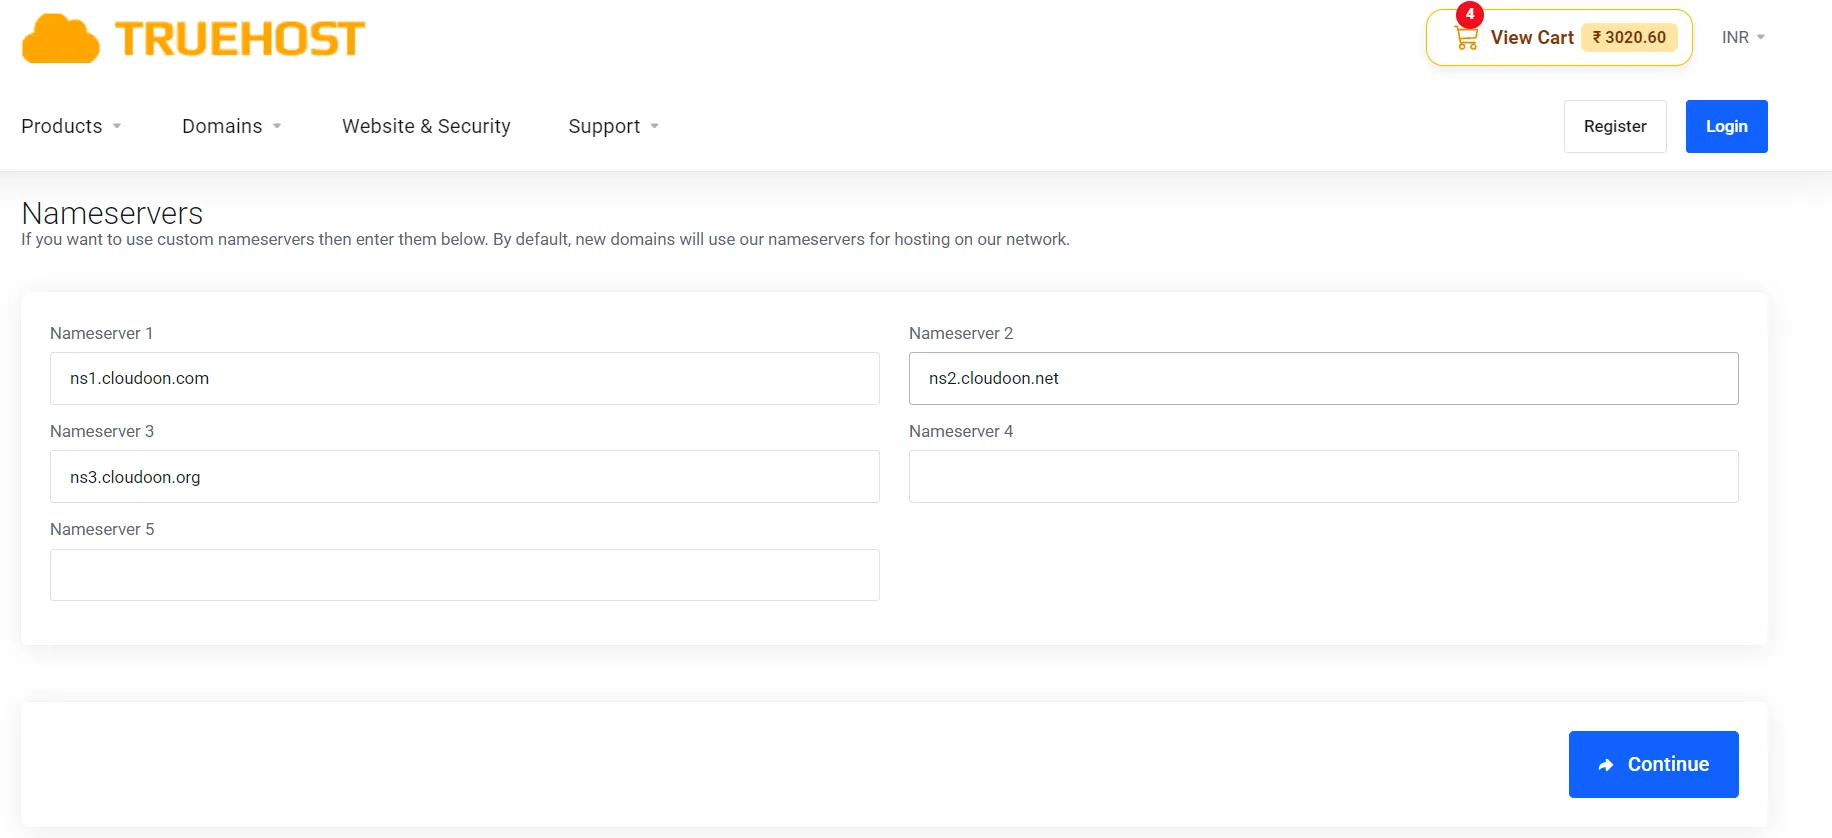
A domain purchase doesn’t require hosting from the same provider. You can buy the domain alone and point it to hosting elsewhere.
Bundling with Truehost hosting makes sense if you’re launching a new site or planning a WordPress build. It keeps your domain and server management in one place.
If you already have hosting set up, look for the option to skip the hosting upsell at checkout. Truehost places this clearly, so you won’t get stuck paying for something you don’t need.
Step 5: Complete Payment
Truehost accepts several payment methods for Indian buyers: UPI, net banking, credit and debit cards, Stripe, and PayPal.
UPI remains the most common choice among Indian buyers, so here’s how that flow works. Select UPI at checkout, then choose your preferred app.
You’ll set up an autopay mandate for renewal convenience, which you can cancel anytime from your UPI app if you’d rather renew manually.
Before you submit payment, the confirmation screen shows your domain name, chosen extension, billing cycle, and total cost.
Review these details carefully, since this is your last chance to catch an error before the charge goes through.
Step 6: Verify and Activate Your Domain
After payment clears, ICANN requires a verification email for every new domain registration. Check your inbox and click the confirmation link within 15 days.
Missing this deadline leads to the suspension of your domain. If that happens, log in to your account and resend the verification email to restore access.
For most extensions, activation happens almost instantly once payment clears and verification completes. You’ll see your domain live in your account dashboard within minutes.
Troubleshooting Common Domain Purchase Issues
1) Payment Declined at Checkout
Start by confirming the billing address you entered matches your card or bank account exactly, including the postal code. A small mismatch causes most declines.
If the card method fails, switch to UPI or net banking instead. Gateway-specific issues happen often, and switching methods usually solves them.
Some Indian banks flag first-time international transactions, even when the merchant processes locally. Call your bank if you suspect this is the cause.
Give it a few minutes before trying again. Repeated resubmissions in quick succession can trigger additional fraud flags and make the problem worse.
2) Domain Shows “Pending” After Payment Clears
A short delay after payment is normal. Registry sync usually takes a few minutes, though it can stretch longer during busy periods.
If your domain still shows pending after several hours, reach out to Truehost support. Anything beyond that window is worth flagging.
Before you raise a ticket, gather your order ID, the domain name in question, and a screenshot of your payment confirmation. This speeds up the support response.
3) Never Received the ICANN Verification Email
Check your spam and promotions folders first, since email filters often catch these messages by mistake.
Confirm the email address you entered at signup is correct and one you check regularly. A typo here means the message never arrives.
You can trigger a resend of the verification email from your client area. Look for the domain in question and select the resend option.
Remember the 15-day deadline still applies. If it passes without verification, your domain gets suspended until you complete the step.
4) Domain Locked, Can’t Transfer or Edit Nameservers
A 60-day lock after registration is standard ICANN policy, applied by every registrar, not something specific to Truehost.
During the lock period, you can still manage your DNS settings, connect to hosting, and set up email accounts. Only the transfer and certain nameserver changes stay restricted.
The lock lifts automatically once the 60 days pass, and you can then move or transfer your domain freely.
How Much Does a Domain Cost on Truehost.co.in?
Here’s a rough breakdown of what to expect for common extensions:
| Extension | First Year | Renewal |
|---|---|---|
| .in | N/A | N/A |
| .co.in | N/A | N/A |
| .com | N/A | N/A |
Truehost keeps renewal pricing close to first-year pricing across most extensions. This differs from the industry pattern of a cheap first year followed by a steep renewal jump.
If you’re moving a domain from another registrar, transfer pricing usually sits close to a standard renewal cost. Check the live rate for your specific extension before starting a transfer.
FAQs
How do I renew or transfer a domain to Truehost?
Log in to your Truehost account and find the domain under your dashboard. Renewal and transfer options both sit within the domain management panel, with clear prompts for each.
Can someone outside India register a .in or .co.in domain?
Yes. Both extensions allow registration from buyers outside India, with no residency requirement attached to the purchase.
What happens if I forget to renew my domain?
Your domain enters a grace period first, followed by a redemption stage with added fees. After that window closes, the domain becomes available for anyone to register again.
Can I move my domain to another registrar later if I change my mind?
Yes, once the initial 60-day lock period ends. You can request a transfer authorization code from your account and move your domain whenever you choose.
Register Your Favorite Domain Today
Buying a domain on Truehost.co.in comes down to a handful of clear steps: search, choose your extension, pay, and verify.
Most buyers finish the whole process in under ten minutes.
Ready to see if your name is still free? Head to Truehost’s domain search tool and check right now.