Web HostingBudget-friendly shared hosting plans
 Domains SearchFrom .com to unique country domains, explore and register extensions worldwide.
 WordPress HostingPower your blog or business with WordPress hosting.
 Email HostingSimple, secure email hosting that helps you stay connected and professional.
 Reseller HostingStart your own hosting business with easy and reliable reseller hosting plans.
 AffiliateJoin our affiliate program and earn commissions every time you bring in new customers.
 cPanel HostingHosting powered by cPanel, the world’s most user-friendly control panel.
 Windows HostingBuilt for Windows applications and websites
 IN Domain PricesDon’t miss out on the best domain deals in India!
 WHOIS LookupFind out who owns a domain name with a quick and easy WHOIS search.
 .Com DomainGet the most trusted domain for worldwide credibility
 All TldsSearch and register domain extensions worldwide.
 VPS HostingPowerful virtual servers. Full root access. Reliable uptime.
 Managed VPS HostingNot a tech expert? Choose our fully managed VPS service.
 Dedicated ServersTake full power and total control of your own physical server.
Last updated on March 21st, 2026 at 04:23 am
From the previous article, you already know the risks of making changes directly on a live WordPress website.
You also understand why staging is the professional standard. And you’ve now decided to do things the right way.
This article is going to show you exactly how to set up a staging site through cPanel.
If you follow the steps outlined, you’ll have a fully functional staging site set up.
The best thing? No technical background is required.
What You Need Before You Start
Before jumping into the steps, make sure you have the following in place. This will save you from unnecessary back-and-forth.
1) An active hosting account with cPanel access
Your hosting provider must give you access to a cPanel dashboard.
If you’re not sure whether your plan includes cPanel, log in to your hosting account and look for a “Control Panel” or “cPanel” link.
Alternatively, try navigating to yourdomain.com/cpanel in your browser.
2) An existing WordPress installation
You need a live WordPress site already installed on your hosting account.
This is the site you’ll be cloning into a staging environment.
If you haven’t installed WordPress yet, do that first through cPanel’s Softaculous or WP Toolkit.
3) Softaculous or WP Toolkit on your plan
Log in to cPanel and check whether you have the Softaculous Apps Installer or WP Toolkit.
Most standard shared hosting plans include Softaculous.
WP Toolkit is available on select plans, often through providers like Plesk-based hosts or premium cPanel setups.
If you have both, either will work. However, WP Toolkit offers a slightly more streamlined staging experience.
4) Enough storage on your hosting account
A staging site is a full copy of your live site.
That means you’ll need roughly double the storage your current WordPress installation uses.
To check your storage usage, look for the Disk Usage tool in cPanel.
If your hosting doesn’t provide enough storage or requires a significant investment to upgrade, consider our hosting plans.
5) A fresh backup of your live site
Before you do anything, back up your live website. Y
You can do this through cPanel’s Backup Wizard, a WordPress backup plugin like UpdraftPlus, or through your hosting provider’s backup system.
It only takes a few minutes but gives you a safety net for everything that follows.
Creating a Staging Site Using Softaculous
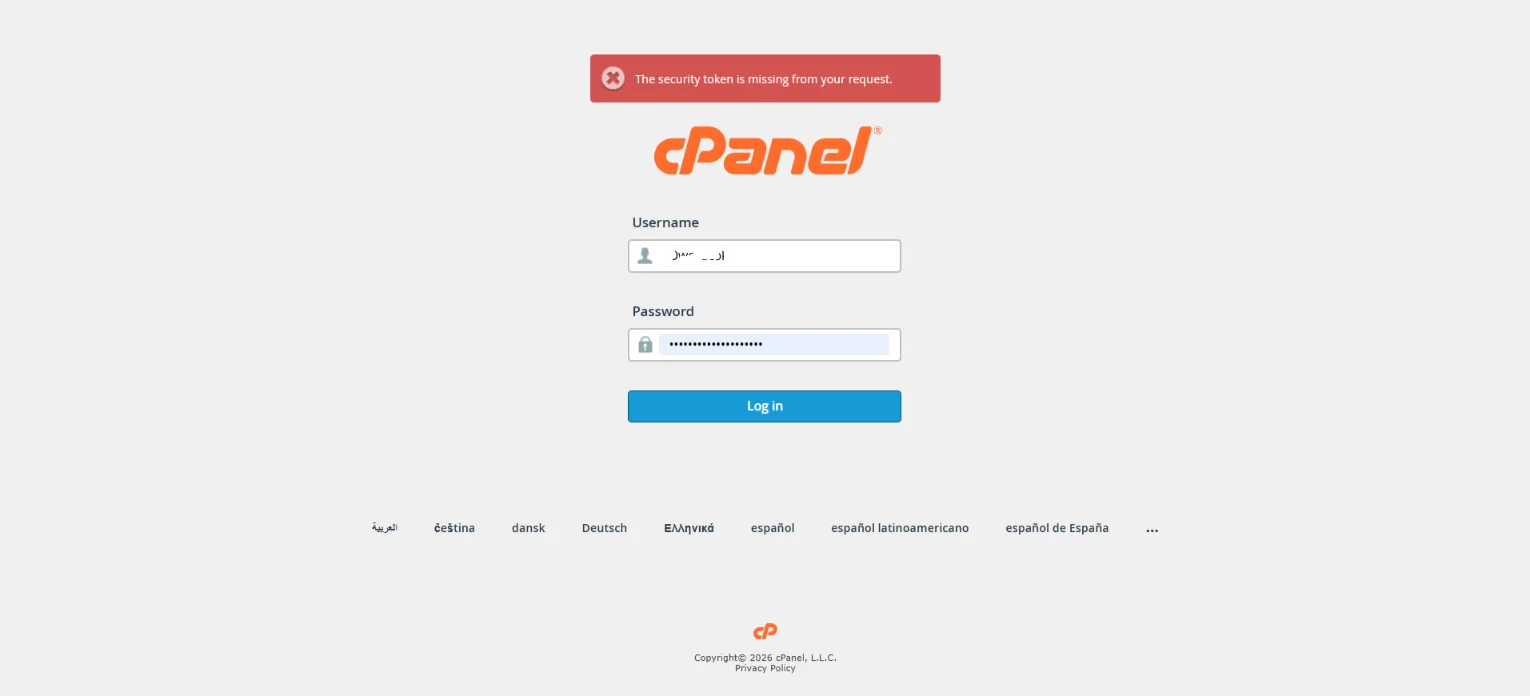
Step 1) Log In to cPanel
Open your browser and navigate to your cPanel login page, typically found at yourdomain.com/cpanel or through your hosting provider’s dashboard.
Enter your username and password to log in.
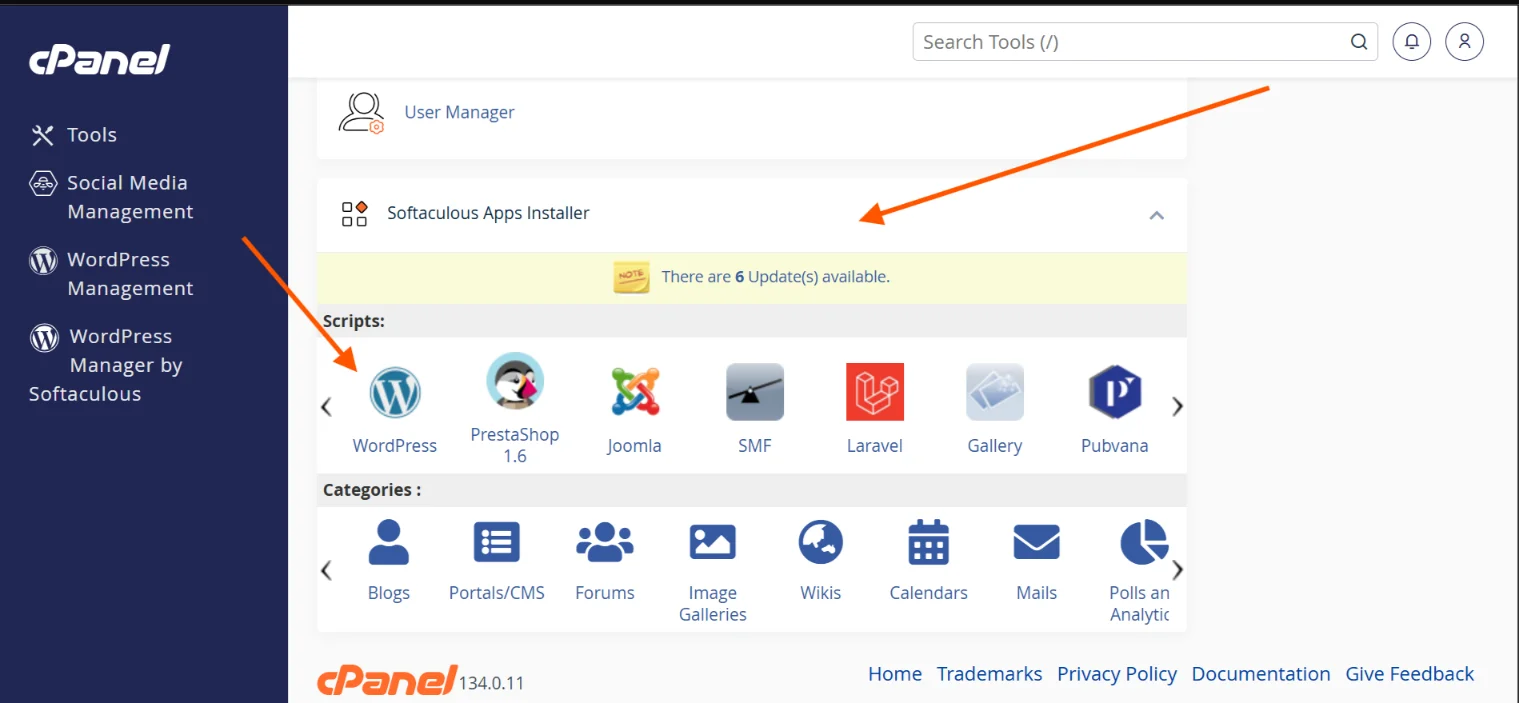
Step 2) Open Softaculous Apps Installer
On the cPanel home screen, scroll down to the Software section.
Click on Softaculous Apps Installer.
In the Softaculous dashboard, locate WordPress.
Step 3) Access Your Existing WordPress Installation
At the top of the WordPress section, click the All Installations icon (a grid or list icon near the top right).
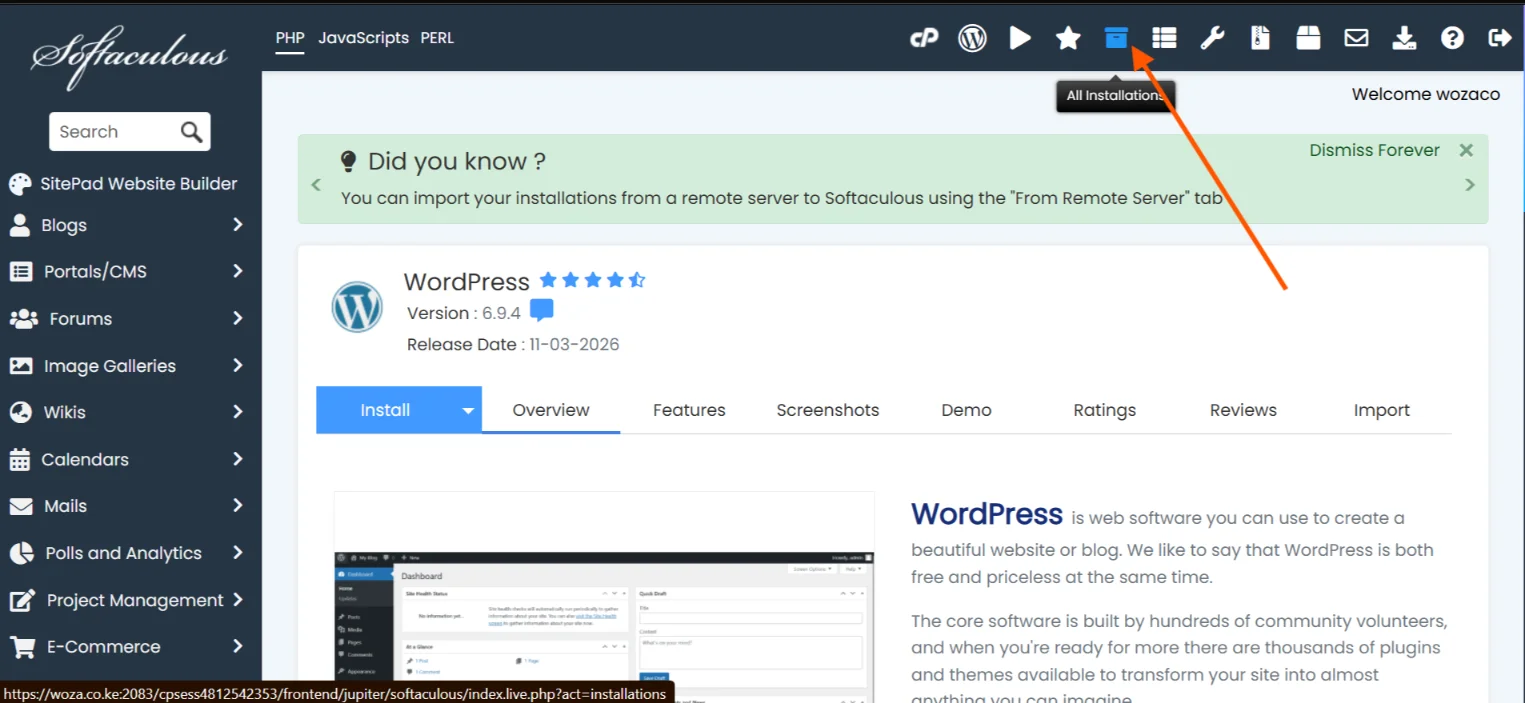
You’ll see a list of all WordPress sites installed on your hosting account.
Identify the live site you want to clone.
Step 4) Clone the Installation
Next to your live WordPress site, click the Clone icon (two overlapping squares, or labeled “Clone”).
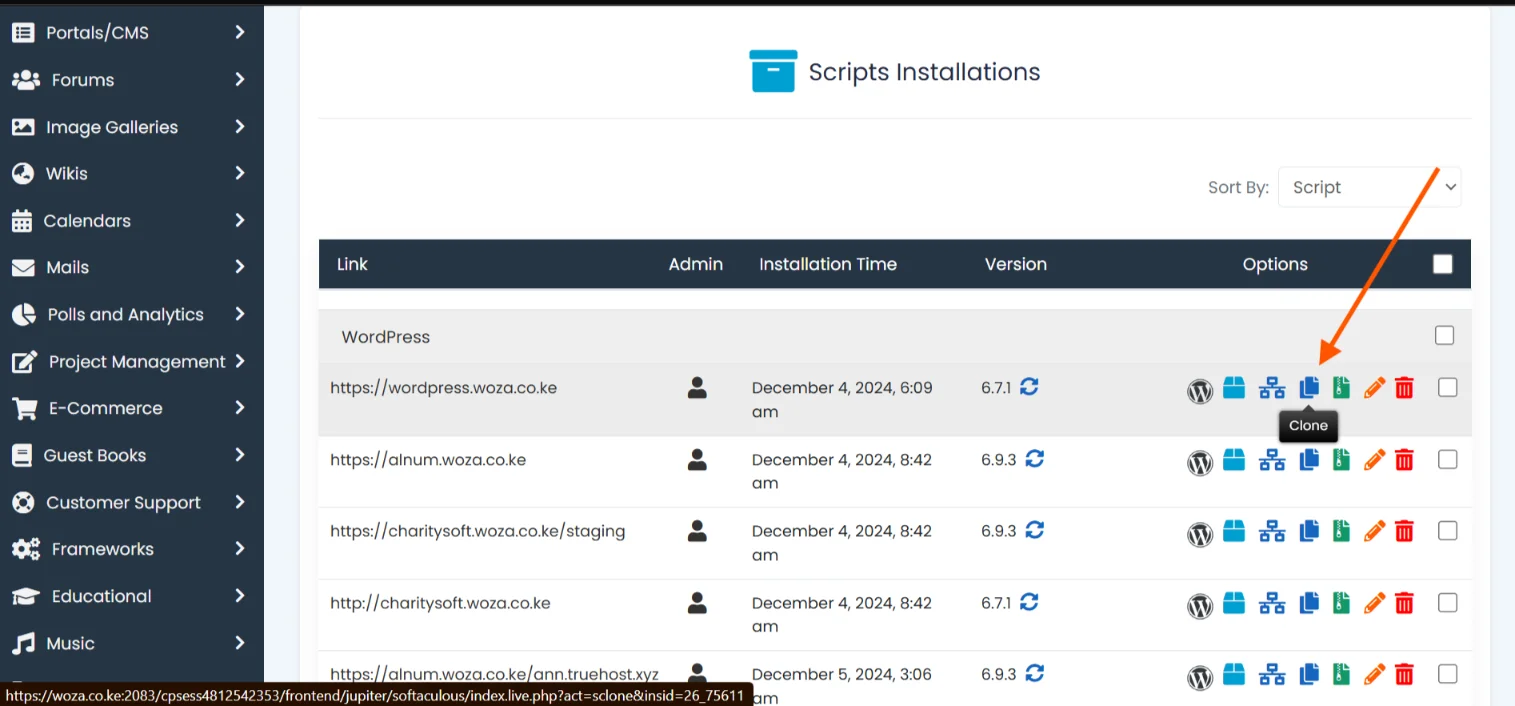
A cloning form will load with several configuration fields.
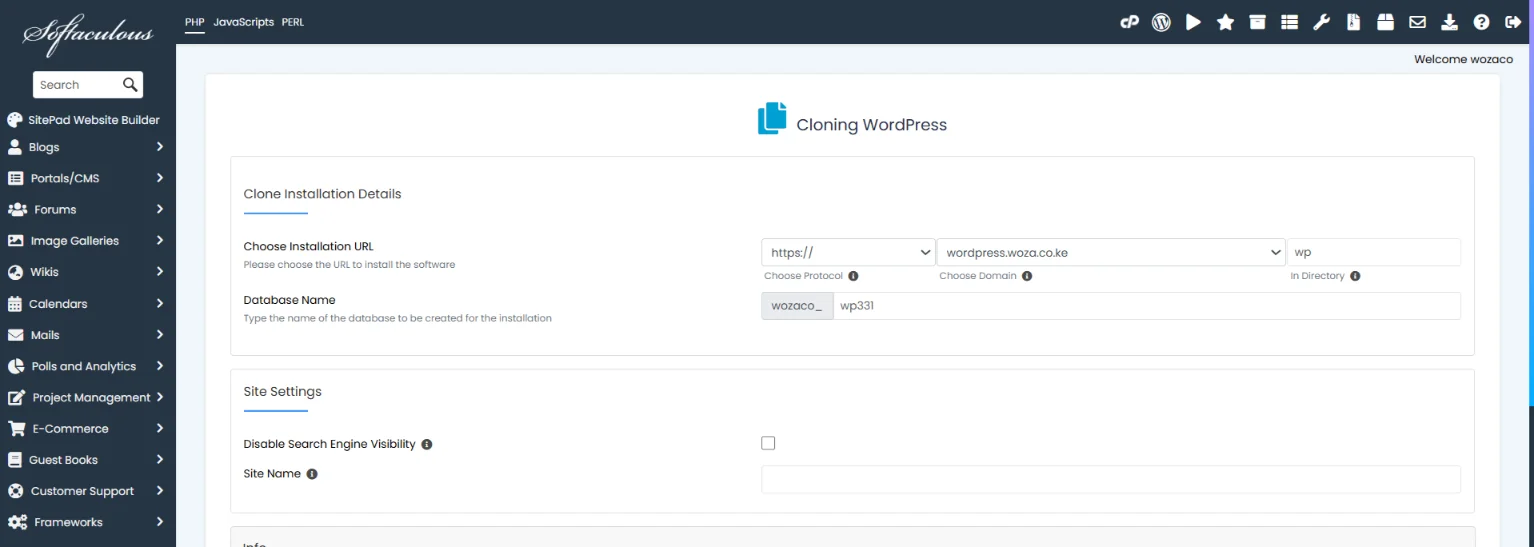
Step 5) Configure the Staging Environment
Fill in the form with the following details:
Protocol: Select https:// if you have an SSL certificate, or http:// if not.
Domain: Select your primary domain from the dropdown.
In Directory: Type a name for your staging subdirectory.
For example, staging will make your site accessible at yourdomain.com/staging. If you prefer a subdomain like staging.yourdomain.com, create the subdomain first under the Domains section in cPanel.
Database Name: Softaculous will auto-generate a new database name. You can leave this as-is or rename it for easy identification.
Here, you can also disable search engine visibility to discourage search engines from indexing your site.
Step 6) Run the Clone
Scroll to the bottom and click Clone Installation.
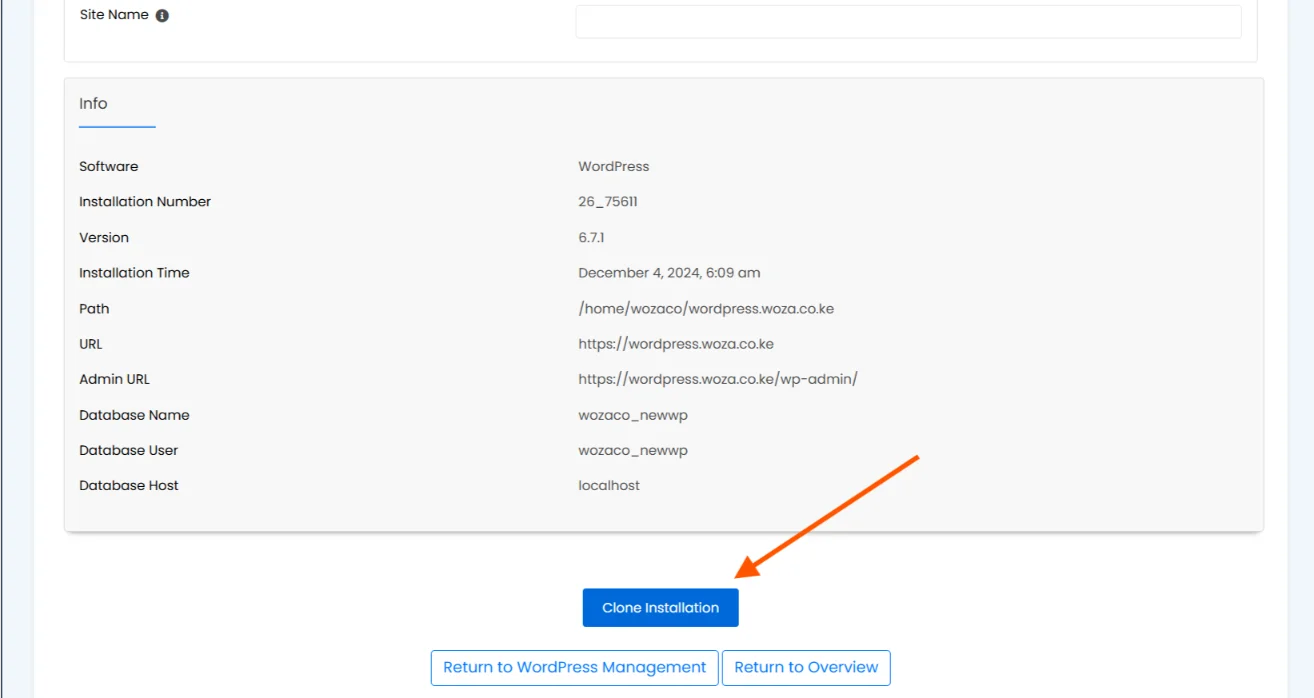
Softaculous will copy your WordPress files and duplicate your database to the new staging location.
Wait for the process to complete. This may take a few minutes for larger sites. Keep the browser tab open throughout.
Once finished, a success message will appear along with a direct link to your staging site.
Step 7) Verify and Start Testing
Click the link to open your staging site and confirm that all pages, images, and content have transferred correctly.
Log in to the staging WordPress admin using your existing WordPress credentials.
You’re now free to make changes without affecting your live site.
Pushing Changes with Softaculous
Softaculous doesn’t have a built-in push-to-production feature.
As such, moving changes from staging to live requires a manual approach.
Here are two reliable options:
Option A: Use a migration plugin
- Install a plugin like Duplicator or All-in-One WP Migration on your staging site.
- Use the plugin to create a full export package of your staging site.
- On your live site, use the same plugin to import the package.
- After importing, update any URLs if needed using a plugin like Better Search Replace.
Option B: Manual file and database migration
- Use an FTP client like FileZilla to download the modified files from your staging directory.
- Upload those files to the corresponding locations in your live site’s directory.
- Export the staging database using phpMyAdmin in cPanel.
- Import the exported database into your live site’s database, also through phpMyAdmin.
- Update any staging URLs in the live database to reflect the live domain.
Method 2: Creating a Staging Site Using WP Toolkit
WP Toolkit is a more powerful WordPress management interface available on certain cPanel hosting plans (commonly found on Plesk-based or premium cPanel setups).
If your host provides it, WP Toolkit is arguably the easier of the two options.
Step 1) Log In to cPanel and Open WP Toolkit
Log in to your cPanel account as usual.
In the cPanel dashboard, look for WP Toolkit
It’s usually listed under the WordPress section or as a standalone icon.
Click to open WP Toolkit. You’ll see a list of all WordPress installations on your account.
Step 2) Select Your WordPress Installation
Find the live WordPress site you want to stage.
Click on it to expand its details, or click Manage to open its full settings panel.
Step 3) Navigate to the Staging Option
Inside the site’s management panel, look for the Staging tab or a button labeled Create Staging Copy or Copy.
Click it. WP Toolkit will present you with a staging setup screen.
Step 4) Configure the Staging Copy
WP Toolkit gives you clear options for how to set up your staging environment:
Destination: Choose whether to deploy the staging site to a subdomain (e.g., staging.yourdomain.com) or a subdirectory (e.g., yourdomain.com/staging).
WP Toolkit can often create the subdomain automatically.
What to copy: Select whether to copy the files only, the database only, or both. For a true staging environment, always choose both.
WP Toolkit may also offer options to suspend search engine indexing on the staging site.
Step 5) Create the Staging Site
Review your settings and click Start or Create Staging Copy.
WP Toolkit will clone your WordPress installation to the specified location.
The process runs in the background.
You’ll see a progress indicator and a notification once it’s complete.
Step 6) Access and Test the Staging Site
Once the staging site is ready, WP Toolkit will display a link to it directly in the dashboard.
Click the link to open your staging site and verify that everything looks correct.
Log in to the staging admin panel and begin your testing.
Step 7) Sync Changes Back to the Live Site
One of WP Toolkit’s biggest advantages over Softaculous is its sync feature.
Once you’ve finished making and testing changes on your staging site, you don’t need to manually migrate anything.
Go back to WP Toolkit and open your staging site’s management panel.
Click Push to Production or Sync (the exact label may vary by hosting provider).
WP Toolkit will show you a summary of what will be changed on the live site.
Review the changes carefully, then confirm.
WP Toolkit will apply the staging changes to your live site automatically.
Common Mistakes to Avoid When Using a Staging Site
Setting up a staging site is sort of simple but there are a handful of mistakes that can undermine the whole process.
Here’s what to watch out for:
a) Making changes on the live site while staging is active
This is the most common mistake.
Once you’ve created a staging copy and started working on it, stop making changes to the live site.
If both environments are being modified simultaneously, you risk overwriting live changes when you push staging or ending up with a confusing mix of old and new content.
b) Forgetting to sync the database
If your changes involved any content updates, those changes live in the database, not just the files.
When pushing changes to the live site, make sure you’re migrating both the files and the database, not just one or the other.
c) Not blocking search engines on the staging site
A staging site is a duplicate of your live site.
If search engines index it, you could face duplicate content penalties that hurt your live site’s rankings.
Always ensure your staging site is either password-protected, set to discourage search engines, or blocked via your hosting tool (WP Toolkit does this automatically).
d) Skipping the final backup before pushing
Even if you’re confident everything on staging works perfectly, always take a fresh backup of your live site right before you push changes.
The migration process itself can occasionally introduce unexpected issues.
e) Testing on staging but not verifying on the live site
After pushing changes to your live site, do a full walkthrough.
Click through your most important pages. Test your forms. Check your checkout process if you run a store.
What works on staging usually works live, but not always. Verify before you consider the job done.
d) Leaving the staging site running indefinitely
Once you’ve pushed your changes and verified the live site, delete or disable the staging environment.
A forgotten staging site uses up your hosting storage and could become a security vulnerability if it’s left unmaintained and unprotected over time.
Reminder: Your Hosting Matters
The process of setting up a staging account via cPanel is genuinely straightforward.
But only if your hosting environment supports it.
As I highlighted in the first article of this series, your hosting provider directly shapes how easy or difficult the staging process is.
Everything covered in this guide assumes you have cPanel access with either Softaculous or WP Toolkit available.
If your current host doesn’t provide these tools, you won’t be able to follow these steps and you’ll be pushed toward more technical, time-consuming alternatives.
Beyond the tools themselves, staging requires:
- Sufficient disk space to run two copies of your site simultaneously
- A server environment that closely mirrors your live setup
- A support team that can help when something doesn’t go as expected
If you followed this guide and hit a wall because of your hosting, try Truehost. The process will be as simple as it should be.