Web HostingBudget-friendly shared hosting plans
 Domains SearchFrom .com to unique country domains, explore and register extensions worldwide.
 WordPress HostingPower your blog or business with WordPress hosting.
 Email HostingSimple, secure email hosting that helps you stay connected and professional.
 Reseller HostingStart your own hosting business with easy and reliable reseller hosting plans.
 AffiliateJoin our affiliate program and earn commissions every time you bring in new customers.
 cPanel HostingHosting powered by cPanel, the world’s most user-friendly control panel.
 Windows HostingBuilt for Windows applications and websites
 IN Domain PricesDon’t miss out on the best domain deals in India!
 WHOIS LookupFind out who owns a domain name with a quick and easy WHOIS search.
 .Com DomainGet the most trusted domain for worldwide credibility
 All TldsSearch and register domain extensions worldwide.
 VPS HostingPowerful virtual servers. Full root access. Reliable uptime.
 Managed VPS HostingNot a tech expert? Choose our fully managed VPS service.
 Dedicated ServersTake full power and total control of your own physical server.
If your website is still loading on plain HTTP, you’re already losing people.
Modern browsers warn visitors with a “Not Secure” tag, and most Indians won’t continue once they see it.
Google also gives a slight advantage to sites on HTTPS, so staying unprotected hurts your rankings too.
The good news is that setting up an SSL certificate is easier than most people think.
In this guide, I’ll walk you through the entire process step by step, so you can secure your site without second-guessing anything.
Let’s get your website protected and ready for visitors.
How to Install an SSL Certificate on Your Website
Before you move into the steps, there’s one thing you should know.
Installing an SSL certificate is mostly a one-time setup, but it needs to be done the right way.
A small mistake can break pages, create redirect loops, or trigger security warnings in the browser.
So take it slow, follow each step, and you’ll be fine.
Step 1: Choose the Right Type of SSL Certificate
Before you install an SSL certificate, you need to choose the one that actually fits your website.
Most people in India don’t realize there are different types of SSL certificates, and each has its requirements and offers a different level of verification and trust.
Here’s a quick breakdown of the main options:
- Domain Validation (DV) SSL: The fastest and most affordable type of SSL certificate which is best for personal websites, blogs, portfolios, and new businesses that just need basic encryption.
- Organization Validation (OV) SSL: This verifies your business details before activation. So, it’s an ideal choice when you want extra trust and a certificate that shows your brand is legitimate.
- Extended Validation (EV) SSL: The highest level of validation available. It is ideal for banks, financial institutions, and large eCommerce brands that need maximum credibility.
If you don’t have specific compliance requirements, start with a DV SSL. It’s quick to activate and covers most website needs.
And whenever you’re ready to move to OV or EV, upgrading through Truehost is smooth, straightforward, and affordable.
Step 2: Purchase or Obtain an SSL Certificate
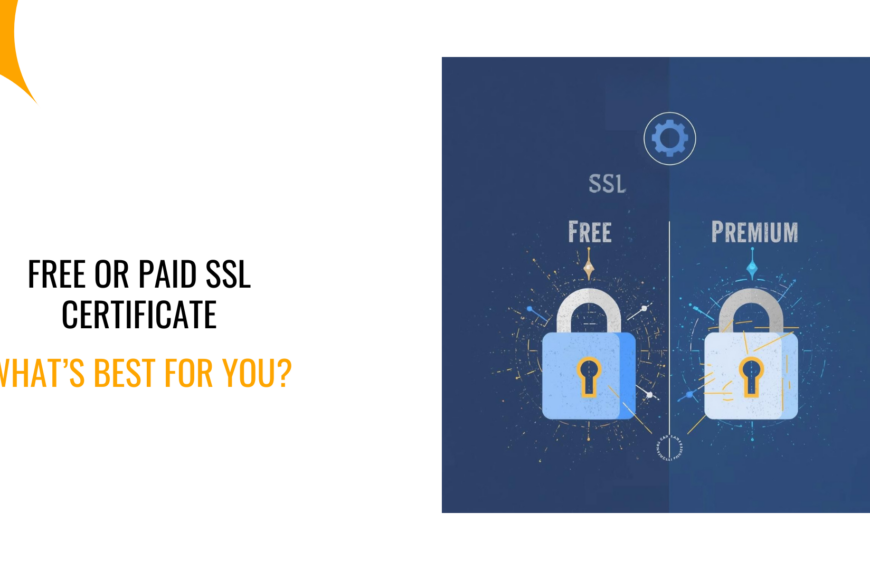
Once you’ve chosen the type of SSL certificate you need, the next decision is simple. Will you buy one or use a free option?
Both work, but the right choice depends on where your website is right now.
In India, you’ll usually pick between these two paths:
Option 1: Buy an SSL Certificate
If you want stronger verification or you’re running a business, buying an SSL makes more sense.
Paid SSL certificates often come with features like:
- Higher validation
- Strong warranties
- Better customer support
- More trust for users
Most established businesses prefer this route because it reassures visitors that the brand is legitimate.
Thankfully, at Truehost, we offer several paid SSL plans for startups, SMEs, and growing online stores.
Option 2: Use a Free SSL Certificate (Let’s Encrypt)
If you’re just starting out, a free SSL is a smart way to secure your site without spending money.
But where do you get a free ssl certificate? It’s simple.
Let’s Encrypt is widely used across India, especially by new blogs, student projects, and early-stage startups.
It gives you basic encryption and activates quickly.
But also, at Truehost, we offer free SSL. All you need is to get a web hosting package, and we automatically ship a free SSL with it for you.
Step 3: Generate a Certificate Signing Request (CSR)
This part looks technical at first, but don’t worry. It’s much easier once you know what’s happening.
To issue your SSL certificate, your hosting account needs to create something called a CSR.
Think of it as a small file that holds your domain details. You generate it once and submit it to your SSL provider.
Here’s how it works on most hosting dashboards in India, including Truehost:
- Log in to your hosting control panel (cPanel or CyberPanel).
- Open the SSL/TLS or Security section.
- Click Generate CSR.
- Fill in the basic details such as your domain name, country (IN), state, and business name if you have one.
- Save the CSR and the Private Key that gets created with it.
The best thing, if you’re hosting with Truehost, our panel walks you through each field, so you won’t be guessing what to do next.
Step 4: Install the SSL Certificate on Your Web Server
Once your SSL certificate is issued, you’ll receive a few important files:
- The certificate file
- The CA bundle
- Your private key (generated during the CSR step)
Now it’s time to install them on your hosting server.
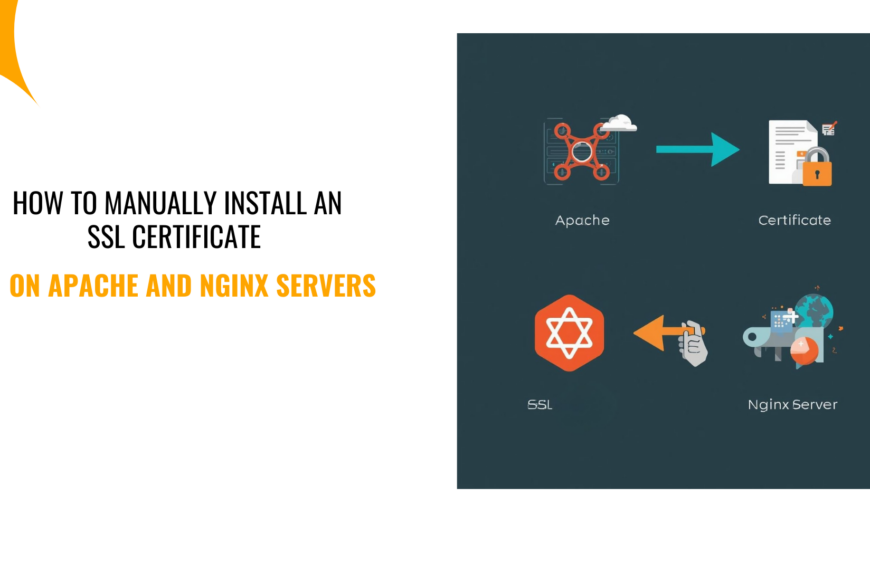
1) For cPanel Users
Most websites in India run on cPanel because it’s simple and familiar. Here’s what you need to do:
- Log in to cPanel.
- Open SSL/TLS > Install Certificate.
- Paste your certificate, private key, and CA bundle.
- Click Install SSL.
Once you do that, cPanel handles the rest.
2) For CyberPanel
If you’re using CyberPanel, installing an SSL certificate is also a straightforward process. Do this:
- Open CyberPanel.
- Select the domain you want to secure.
- Go to SSL > Manage SSL.
- Upload your certificate files or issue a free Let’s Encrypt SSL directly from the panel.
If you prefer manual installation through Apache or Nginx, we also have step-by-step guides to help you through it.
Step 5: Update Your Website to HTTPS
Installing the SSL certificate is only half the job.
Your site still needs to use HTTPS on every page.
Otherwise, if you skip this part, visitors may see mixed-content warnings, and some pages might not load correctly.
So, do this:
- Update your site URL: If you’re using WordPress, go to Settings > General and change your site address from http:// to https://. This tells your website to load securely by default.
- Add HTTPS redirects: To make sure every visitor lands on the HTTPS version, add this to your .htaccess file:
RewriteEngine On
RewriteCond %{HTTPS} off
RewriteRule ^(.*)$ https://%{HTTP_HOST}%{REQUEST_URI} [L,R=301]
This forces all traffic to the secure version of your site.
- Update internal links: Check your menus, buttons, and page links. If any still point to HTTP, update them to HTTPS to avoid warnings.
- Update CDN and DNS settings: If you’re using Cloudflare or any CDN in India, enable “Always Use HTTPS.” This ensures secure delivery across all cached content.
Once you complete these steps, your website will load securely every time for every user.
Step 6: Verify SSL Installation
Now that everything is set up, take a minute to test your SSL.
This step is important because even a tiny mistake, like one HTTP link, can trigger warnings or break a page.
Here are a few reliable tools you can use:
- SSL Labs SSL Checker
- Why No Padlock
- Digicert SSL Tool
These tools help you confirm:
- Your SSL certificate is installed correctly
- There are no mixed-content issues
- Your domain is fully secure
- Browsers trust your certificate without any errors
If something doesn’t look right, it’s usually caused by an old HTTP link or a redirect issue. Fix the highlighted problem, run the test again, and you’re good to go.
Frequently Asked Questions (FAQs)
1) How much does an SSL certificate cost in India?
SSL prices in India vary depending on the type and features:
- Domain Validated (DV) SSL: Free (Let’s Encrypt) up to around ₹800–₹1,000/year
- Organization Validated (OV) SSL: Typically ₹4,000–₹5,200/year
- Extended Validation (EV) SSL: Starts around ₹12,000/year and can go higher
At Truehost, we provide both free SSL for beginners and premium SSL plans for businesses that need higher validation and trust at a pocket friendly cost.
Final Thoughts
Installing an SSL certificate in India isn’t as hard as it sounds. Once you break it down into simple steps, the process becomes straightforward.
And the benefits are huge.
Your customers trust your site more. Your Google rankings improve. Your website loads securely.
If you want the easiest setup, the fastest activation, and support when you need it, you can get your SSL directly from Truehost.
We offer affordable SSL certificate plans and ensure the installation process is fast and simple, whether you’re beginner or skilled.
Ready to secure your website? Grab these Truehost SSL certificate offers now to get started.